Easy Creamy Dill Dip Recipe- Quick Appetizer
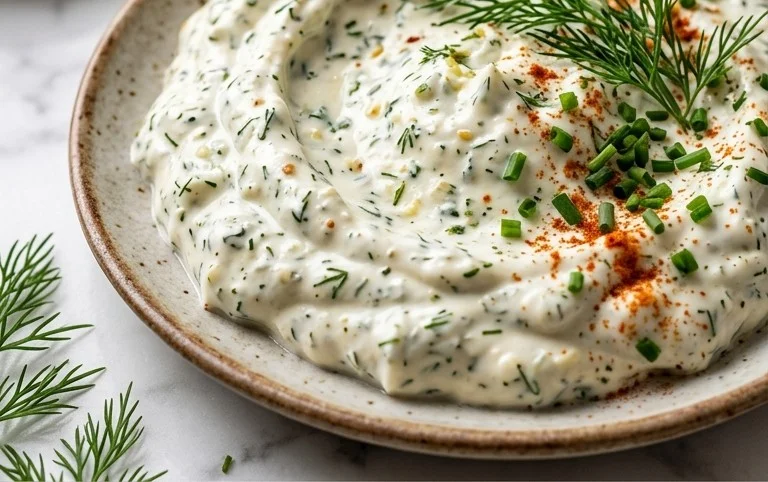
Dill dip is an absolute summertime superstar, and for good reason! This creamy, herbaceous concoction has a way of transforming humble vegetables into party-ready delights and elevating any gathering from ordinary to extraordinary. It’s the kind of appetizer that disappears faster than you can say “pass the chips,” leaving everyone clamoring for the recipe. What makes this particular dill dip so universally loved? It’s that perfect balance of cool, tangy creaminess punctuated by the bright, zesty pop of fresh dill. It’s incredibly versatile, acting as the ideal partner for crisp carrots, crunchy bell peppers, or even as a dip for pita bread and crackers. The beauty of this dill dip lies in its simplicity and its ability to bring a fresh, vibrant flavor to any occasion. Get ready to impress your friends and family with this irresistible classic!
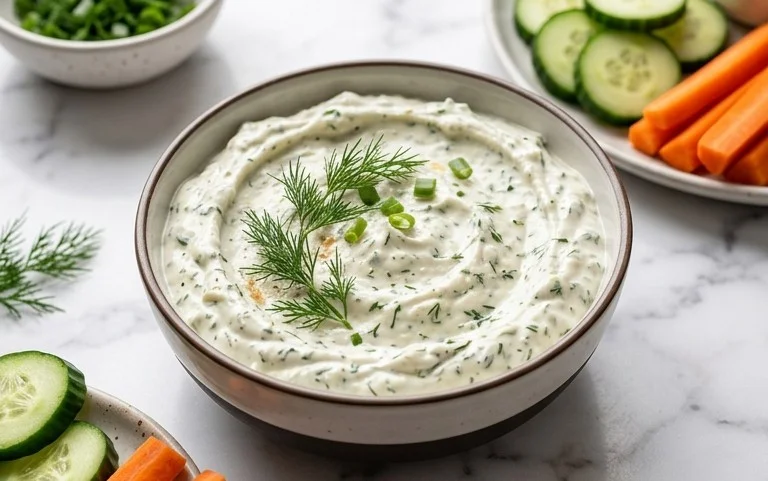
Dill Dip
This Dill Dip is an absolute crowd-pleaser, a staple at every gathering I host. It’s incredibly simple to whip up, yet its fresh, herby flavor is so satisfying. It’s the perfect accompaniment to a platter of crisp vegetables, a side for grilled chicken, or even a glorious spread for sandwiches. The beauty of this dip lies in its versatility and its ability to elevate even the simplest of snacks. I’ve tinkered with this recipe over the years, and I’ve found this balance of creamy richness and bright, herbaceous notes to be just right. The key is using fresh dill and parsley – it makes a world of difference compared to dried herbs. So, let’s get started on this delightful creation!
Ingredients:
Let’s Get Mixing!
The preparation for this dill dip is delightfully straightforward, requiring no complex techniques or lengthy cooking times. It’s a dip that truly lets the fresh ingredients shine.
1. The Creamy Base: In a medium-sized mixing bowl, combine the mayonnaise and the sour cream. I like to use full-fat versions of both for the richest flavor and creamiest texture, but you can certainly adjust based on your preference. Give these two ingredients a good stir until they are thoroughly combined and form a smooth, homogenous mixture. It’s important to ensure there are no streaks of either ingredient left. This forms the luscious foundation for our dip. I often find that if my sour cream has been in the fridge for a while, it can be a bit stiff, so a good initial stir here prevents any lumps later on.
2. Adding the Aromatics: Now it’s time to introduce the flavor boosters. Sprinkle the 2 tablespoons of onion flakes directly into the creamy mixture. These flakes will rehydrate as the dip sits, releasing their mild oniony goodness without the sharpness of raw onion. Next, finely chop your fresh dill and fresh parsley. I like to give them a quick rinse and pat them dry before chopping. The amount of dill is crucial here, as it’s the star of the show. Ensure it’s chopped finely enough so that you get bursts of dill flavor in every bite, rather than large, potentially overwhelming sprigs. Add the chopped herbs to the bowl.
3. Seasoning to Perfection: The final touch to our ingredient additions is the seasoning. Add the 1 teaspoon of seasoned salt. I specifically recommend a seasoned salt like Lawrey’s because it already contains a blend of salt, pepper, and other spices that complement the dill and onion beautifully. If you don’t have seasoned salt, you can use regular salt and a pinch of black pepper, but the seasoned variety adds an extra layer of complexity. Stir everything together thoroughly. Make sure to scrape the bottom and sides of the bowl to incorporate all the ingredients.
4. The Chilling Factor – Essential for Flavor Development: This is perhaps the most critical step for achieving the best possible flavor. Once all the ingredients are well combined, cover the bowl tightly with plastic wrap or transfer the dip to an airtight container. Place the dip in the refrigerator for at least 30 minutes, but I highly recommend chilling it for an hour or even longer. This chilling period allows the flavors to meld and deepen. The onion flakes will soften, and the dill and parsley will infuse their fresh aroma into the creamy base. Rushing this step means you’ll have a good dip, but allowing it time to chill transforms it into an exceptional one. You’ll notice a significant difference in the overall taste and aroma after this resting period.
5. The Final Taste and Adjustments: Before serving, give the dill dip a final stir. Taste a small spoonful and adjust the seasoning if necessary. This is your chance to make it perfectly yours! If you feel it needs a little more saltiness, add a tiny pinch more seasoned salt. If you’re feeling bold and want a touch more herbaceousness, a little extra fresh dill wouldn’t hurt. If you prefer a tangier dip, a squeeze of fresh lemon juice can be a wonderful addition, though it’s not part of the core recipe. Once you’re happy with the flavor, your delicious homemade Dill Dip is ready to be served!
Serving Suggestions
This versatile dill dip is perfect for so many occasions. Serve it with a colorful array of fresh vegetables like carrot sticks, celery sticks, bell pepper strips, cucumber slices, and broccoli florets. It’s also fantastic with potato chips, pita bread, crackers, or as a spread for sandwiches and wraps. I often make a batch for game days or holiday parties, and it always disappears quickly! Enjoy!
Conclusion:
There you have it – a simple yet incredibly versatile Dill Dip recipe that’s sure to become a staple in your entertaining repertoire! What makes this dip so fantastic is its incredibly fresh flavor profile, thanks to the star ingredient, dill, beautifully complemented by the creamy base. It’s a crowd-pleaser that requires minimal effort, proving that delicious doesn’t have to be complicated. Whether you’re hosting a party, bringin extractg a dish to a potluck, or just looking for a delightful snack, this Dill Dip is your answer.
I encourage you to give this recipe a try! Experiment with the serving suggestions – it’s not just for chips! Imagin extracte it dolloped onto baked potatoes, spread on a sandwich wrap, or as a refreshing dip for grilled vegetables. Don’t be afraid to get creative with variations either. Adding a pinch of garlic powder, a squeeze of lemon juice, or even a dash of smoked paprika can transform the flavor profile to suit your mood. So go ahead, whip up a batch, and discover how delightful a simple, fresh Dill Dip can be.
Frequently Asked Questions:
Can I make this Dill Dip ahead of time?
Absolutely! In fact, I find that this Dill Dip actually tastes even better after it’s had a chance to chill in the refrigerator for at least an hour. This allows all the flavors to meld together beautifully. You can easily make it a day in advance.
What can I use if I don’t have fresh dill?
While fresh dill offers the brightest flavor, you can certainly use dried dill in a pinch. Generally, you’ll want to use about 1 tablespoon of dried dill for every 3 tablespoons of fresh dill called for in the recipe. Remember that dried herbs are more concentrated, so start with a little less and add more to taste if needed.
Dill Dip
A classic creamy dill dip, perfect for parties and gatherings.
Ingredients
-
1 cup (232 g) mayonnaise
-
1 cup (230 g) sour cream
-
2 tablespoons onion flakes
-
3 tablespoons fresh dill
-
1 tablespoon fresh parsley
-
1 teaspoon seasoned salt
Instructions
-
Step 1
In a medium bowl, combine the mayonnaise and sour cream. -
Step 2
Add the onion flakes to the bowl. -
Step 3
Finely chop the fresh dill and add it to the mixture. -
Step 4
Finely chop the fresh parsley and add it to the mixture. -
Step 5
Stir in the seasoned salt. -
Step 6
Mix all ingredients until well combined. For best flavor, cover and refrigerate for at least 30 minutes before serving.
Important Information
Nutrition Facts (Per Serving)
It is important to consider this information as approximate and not to use it as definitive health advice.
Allergy Information
Please check ingredients for potential allergens and consult a health professional if in doubt.