Easy Buster Bar Ice Cream Dessert Recipe
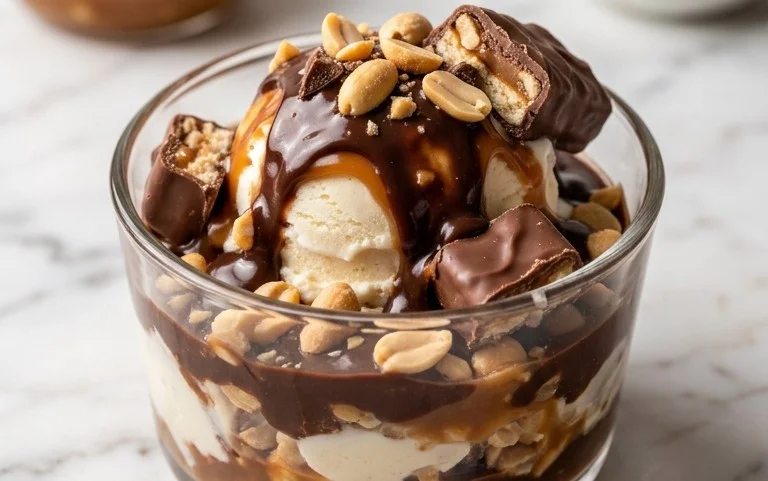
Buster Bar Ice Cream Dessert is a nostalgic trip down memory lane for many of us. Remember those iconic, foil-wrapped delights from the ice cream truck? Now, imagin extracte capturing that same magic, that irresistible combination of chocolate, peanuts, and creamy vanilla ice cream, right in your own kitchen! That’s exactly what this Buster Bar Ice Cream Dessert delivers. It’s more than just a dessert; it’s a comforting embrace, a celebration of simple pleasures that brings smiles to faces of all ages. We love it because it taps into those cherished childhood memories while offering a sophisticated yet utterly accessible treat. What truly makes this Buster Bar Ice Cream Dessert special is its perfect balance of textures and flavors – the satisfying crunch of roasted peanuts, the rich decadence of a chocolate shell, and the cool, smooth embrace of creamy ice cream, all coming together in one delightful package. Get ready to create your own legendary treat!
Buster Bar Ice Cream Dessert
Oh, get ready for a treat that’s pure nostalgia and pure deliciousness! This Buster Bar Ice Cream Dessert is a recreation of that iconic, chocolate-covered, peanut-laden ice cream bar, but in a convenient, shareable dessert form. It’s surprisingly easy to make and always a crowd-pleaser. Imagin extracte layers of crushed Oreos, creamy vanilla ice cream, and a rich, decadent chocolate-peanut coating. It’s the perfect antidote to a hot day or just a perfect reason to indulge. Let’s get started on creating this masterpiece!
Ingredients:
Preparing the Base
The foundation of our Buster Bar dessert starts with a simple yet effective crust. This isn’t your typical pie crust; it’s a crunchy, chocolatey delight that perfectly complements the creamy ice cream and rich topping.
1. In a medium bowl, combine the crushed Oreo cookies with the melted butter. You want to ensure every crum extractb is coated in butter. I like to crush my Oreos in a zip-top bag with a rolling pin – it’s therapeutic and effective! You can also use a food processor, but be careful not to over-process them into a fine powder. We want some texture for our crust. Mix this thoroughly until it resembles wet sand.
2. Press this Oreo mixture evenly into the bottom of a 9×13 inch baking dish. I like to use the flat bottom of a measuring cup or a drinking glass to get a nice, compact layer. Make sure to press it up the sides slightly as well, creating a slight rim. This helps to contain the ice cream and makes for a neater presentation. Place the dish in the freezer for at least 30 minutes while you prepare the next layers. This chilling step is crucial to ensure the crust is firm and doesn’t become soggy when the ice cream is added.
Layering the Ice Cream and Peanuts
Now comes the fun part: building the layers that mimic the beloved Buster Bar.
3. Retrieve the chilled crust from the freezer. Scoop the softened vanilla ice cream evenly over the Oreo crust, spreading it out to create a smooth, even layer. Softened ice cream is key here; it should be pliable enough to spread without tearing the crust, but not so melted that it becomes soupy. If your ice cream is too hard, let it sit at room temperature for about 15-20 minutes, checking on it periodically. Once the ice cream layer is in place, gently press the Spanish peanuts onto the top of the ice cream. I like to use whole or roughly chopped peanuts so you get those satisfying crunches in every bite. Ensure they are distributed evenly across the entire surface.
4. Return the entire dish to the freezer for at least 2-3 hours, or until the ice cream is completely firm. This is essential for the next step, the chocolate topping. If the ice cream isn’t frozen solid, the hot chocolate mixture will melt it, leading to a less-than-ideal texture. Patience is a virtue when it comes to frozen desserts!
Crafting the Decadent Chocolate Topping
This chocolate coating is where the magic truly happens. It’s a rich, glossy, and utterly irresistible layer that will solidify our Buster Bar dessert.
5. While the ice cream is firming up, let’s prepare the glorious chocolate topping. In a medium saucepan, combine the semi-sweet chocolate chips, 1/2 cup butter, and the evaporated milk. Place the saucepan over low heat. Stir continuously, allowing the butter and chocolate chips to melt slowly and evenly into the evaporated milk. It’s important to use low heat to prevent the chocolate from scorching or seizing. Keep stirring gently until the mixture is completely smooth and glossy. This process might take a few minutes.
6. Once the chocolate mixture is smooth and beautifully melted, stir in the powdered confectioner’s sugar. This might seem a bit unusual, but it helps to create that wonderfully fudgy, yet slightly chewy texture that’s characteristic of the Buster Bar coating. Continue stirring until the sugar is fully incorporated and you have a thick, luscious sauce. If it seems too thick, you can add a tiny splash more evaporated milk, but be cautious not to make it too runny. Remove from heat and let it cool slightly for about 5-10 minutes. You want it warm enough to pour and spread, but not so hot that it melts the ice cream instantly.
Assembling and Serving
The final assembly is the grand finnon-alcoholic ale!
7. Retrieve the frozen ice cream and peanut layer from the freezer. Pour the slightly cooled chocolate mixture evenly over the top, spreading it carefully to cover the entire surface, including the edges. Work quickly but carefully to ensure a smooth, even coating. If any of the chocolate drips down the sides, you can gently smooth it with a spatula.
8. Immediately return the dessert to the freezer for at least another 1-2 hours, or until the chocolate topping is firm. This allows the chocolate to set properly.
9. To serve, let the dessert sit at room temperature for about 5-10 minutes to slightly soften the chocolate and ice cream, making it easier to cut. Cut into squares or bars. The combination of the crunchy Oreo base, the cool, creamy ice cream, the nutty crunch, and the rich chocolate coating is simply divine. Enjoy every bite of your homemade Buster Bar Ice Cream Dessert! It’s a taste of pure bliss that you’ll want to make again and again.
Conclusion:
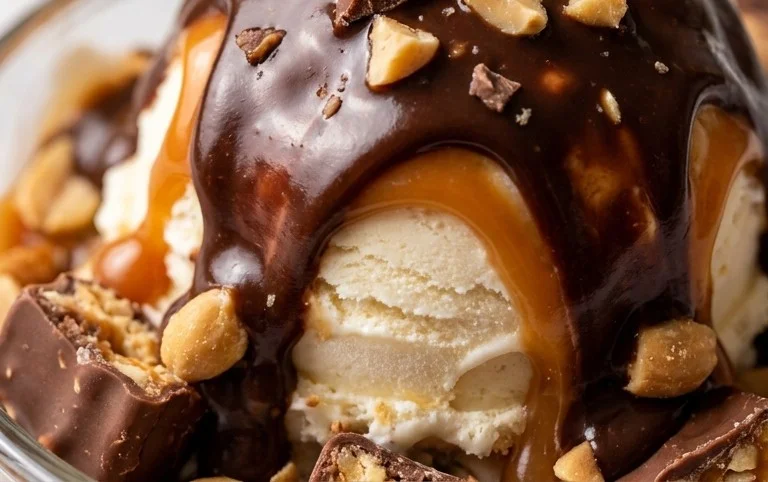
And there you have it – the ultimate guide to creating your very own Buster Bar Ice Cream Dessert! This recipe is truly a winner because it’s surprisingly easy to assemble, yet delivers an explosion of classic, nostalgic flavors that everyone adores. The combination of creamy vanilla ice cream, a crunchy chocolatey shell, and that irresistible peanut butter core is pure magic. It’s the perfect treat for a hot summer day, a family gathering, or even just a solo indulgence when you deserve something special.
To elevate your Buster Bar experience even further, consider serving it with a drizzle of hot fudge or a sprinkle of chopped peanuts for an extra layer of texture and taste. For those who love to experiment, feel free to swap out the vanilla ice cream for a chocolate or strawberry base, or even try different nut butters like almond or cashew. The possibilities are as endless as your imagin extractation!
I truly encourage you to give this Buster Bar Ice Cream Dessert recipe a try. It’s a guaranteed crowd-pleaser and a fantastic way to recreate those beloved childhood treats in your own kitchen. Don’t be intimidated; it’s simpler than you think, and the rewards are delicious!
Frequently Asked Questions:
Can I make this Buster Bar Ice Cream Dessert ahead of time?
Yes, absolutely! You can prepare the entire dessert up to a day in advance. Once assembled and the chocolate shell has hardened, store it in the freezer, well-wrapped, until you’re ready to serve. This makes it an excellent option for parties.
What is the best way to get a smooth, crack-free chocolate shell?
Ensuring a smooth shell often comes down to tempering your chocolate or using a good quality melting chocolate. Make sure the chocolate is fully melted and smooth, and pour it evenly over the ice cream. Working quickly is also key, as the ice cream will start to melt.
Buster Bar Ice Cream Dessert
A no-bake dessert featuring a crushed Oreo crust, creamy vanilla ice cream, crunchy peanuts, and a chocolate drizzle.
Ingredients
-
1 14.3 oz pkg. of Oreo cookies, crushed
-
1/2 C butter, melted
-
1/2 gal. vanilla ice cream, softened
-
1 lb. Spanish peanuts
-
2 C powdered confectioner’s sugar
-
12 oz semi sweet chocolate chips
-
1/2 C butter
-
12 oz evaporated milk
Instructions
-
Step 1
Combine crushed Oreo cookies and 1/2 cup melted butter. Press firmly into the bottom of a 9×13 inch pan. -
Step 2
Spread softened vanilla ice cream evenly over the cookie crust. Sprinkle Spanish peanuts over the ice cream. -
Step 3
In a saucepan, combine chocolate chips, 1/2 cup butter, and evaporated milk. Heat over low heat, stirring constantly, until melted and smooth. -
Step 4
Stir in powdered confectioner’s sugar into the chocolate mixture until smooth. This creates the chocolate topping. -
Step 5
Pour the warm chocolate topping evenly over the peanut layer. -
Step 6
Freeze for at least 2-3 hours, or until firm. Cut into bars and serve.
Important Information
Nutrition Facts (Per Serving)
It is important to consider this information as approximate and not to use it as definitive health advice.
Allergy Information
Please check ingredients for potential allergens and consult a health professional if in doubt.