Easy Bubblegum Ice Cream Recipe – Delicious Fun
Bubblegum ice cream is a nostalgic trip back to childhood, a swirl of vibrant pink and sweet, unmistakable flavor that instantly brings a smile to your face. What is it about this iconic frozen treat that captures our hearts and taste buds? Perhaps it’s the pure, unadulterated joy it represents – the simple pleasure of a summer day, a trip to the amusement park, or the delightful anticnon-alcoholic ipation of blowing a gigantic bubble. This isn’t just any ice cream; bubblegum ice cream is a vibrant explosion of flavor, a playful indulgence that transports us to a simpler, sweeter time. Its distinct aroma and candy-like taste are utterly unique, setting it apart from every other ice cream flavor. Today, we’re diving headfirst into creating our very own batch of this beloved bubblegum ice cream, bringin extractg that classic fun and flavor right into your kitchen.
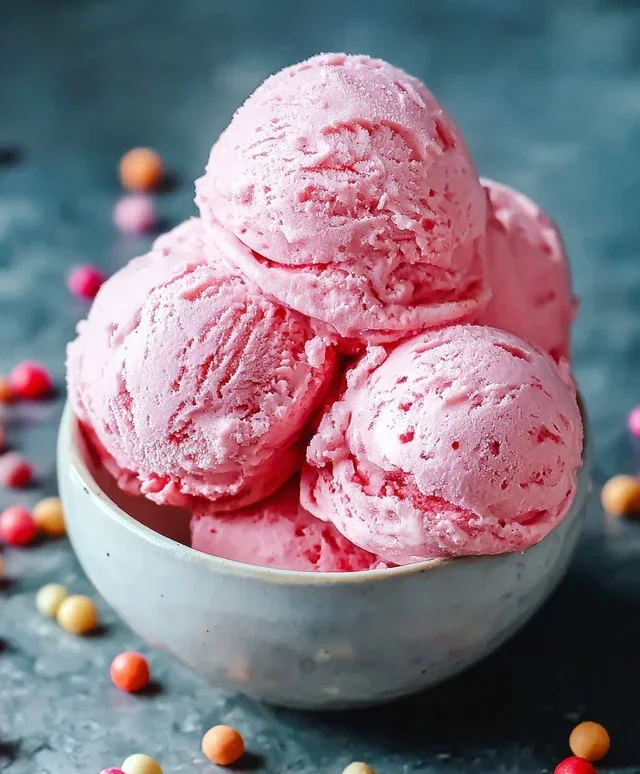
Bubblegum Ice Cream
Get ready to blast back to childhood with this delightful Bubblegum Ice Cream! It’s a vibrant, sweet, and fun treat that’s surprisingly easy to make at home. Perfect for birthdays, summer parties, or just when you need a serious dose of nostalgia, this ice cream is a guaranteed crowd-pleaser. Forget the store-bought stuff; the flavor and texture of homemade ice cream are unparalleled. This recipe is designed to be approachable, even if you’re new to ice cream making. The key is good quality ingredients and a little patience. Let’s dive into creating this whimsical delight!
Ingredients:
Let’s Get Churning!
Now that we have our fantastic ingredients ready, let’s embark on the journey of creating this magical Bubblegum Ice Cream.
1. Whipping Up the Base: In a large mixing bowl, combine the heavy cream, whole milk, granulated sugar, bubblegum flavoring, vanilla extract, and kosher salt. Whisk these ingredients together thoroughly until the sugar is completely dissolved. It’s important to ensure all the sugar granules have vanished, as any undissolved sugar can result in a gritty ice cream texture. You can do this by hand with a whisk, or for a quicker approach, you can use an electric hand mixer on a low speed. Take your time here; a well-dissolved sugar mixture is the foundation for smooth ice cream. Once everything is well combined and smooth, it’s time to add that signature bubblegum color!
2. Coloring the Concoction: Add a few drops of pink or red food coloring to your ice cream base. Start with a small amount and mix it in gently. You can always add more to achieve your desired shade of bubblegum pink. Remember, a little goes a long way with food coloring, and you can always deepen the color if needed. Aim for a vibrant, fun pink that screams “bubblegum!” Stir until the color is evenly distributed throughout the mixture. This is where your ice cream truly starts to come to life and look as fun as it tastes.
3. Chilling is Key: Cover the bowl tightly with plastic wrap and refrigerate the mixture for at least 4 hours, or preferably overnight. This chilling step is absolutely crucial for the best ice cream texture. A thoroughly chilled base allows the ice cream maker to freeze the mixture more efficiently and evenly, resulting in smaller ice crystals and a smoother, creamier final product. While it might be tempting to speed this up, resist the urge! Patience here will be richly rewarded when you taste the final result. Make sure the plastic wrap is pressed directly onto the surface of the liquid to prevent a skin from forming.
4. The Magic of the Ice Cream Maker: Once your base is thoroughly chilled, it’s time to churn! Follow the manufacturer’s instructions for your ice cream maker. Typically, this involves pouring the chilled base into the pre-frozen bowl of your ice cream maker and letting it churn for about 20-30 minutes, or until it reaches a soft-serve consistency. During the last few minutes of churning, gently fold in half of your confetti sprinkles. This will distribute them throughout the ice cream, creating delightful little bursts of color and texture in every bite. Don’t overmix at this stage; you want to suspend the sprinkles, not break them down.
5. Freezing to Perfection and Garnishing: Once churned, the ice cream will be soft. Transfer the ice cream to an airtight freezer-safe container. Press a piece of parchment paper or plastic wrap directly onto the surface of the ice cream to prevent ice crystals from forming. Sprinkle the remaining confetti sprinkles over the top and gently press them in. Now, cover the container tightly. Freeze for at least another 4 hours, or until the ice cream is firm enough to scoop. For an extra special touch and to fully embrace the bubblegum theme, before serving, arrange the gumballs around the container or on top of the ice cream as a colorful and fun decoration. You can even crush some of the gumballs to add a slightly different texture, or use them whole as charming edible adornments. Enjoy your homemade, nostalgic, and absolutely delicious Bubblegum Ice Cream!
Conclusion:
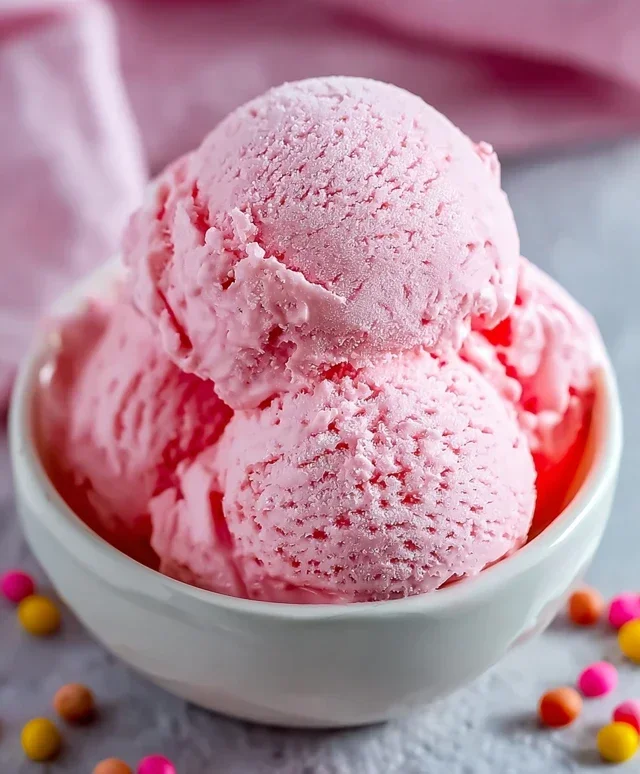
And there you have it – a delightful recipe for homemade bubblegum ice cream that’s sure to bring a smile to your face! This recipe is truly great because it captures that nostalgic, sweet, and fun flavor we all know and love, all within the comfort of your own kitchen. It’s surprisingly easy to make, meaning you can skip the store-bought stuff and enjoy a truly authentic bubblegum ice cream experience.
Serving this vibrant treat is as versatile as it is enjoyable. It’s perfect on its own, of course, but consider piling it high in a waffle cone for an extra special touch. For a truly decadent experience, try it as a base for a milkshake, blended with a splash of milk and maybe even some candy pieces. It also pairs wonderfully with a simple slice of pound cake or as a surprise filling for a hollowed-out cake.
Don’t be afraid to get creative with variations! If you’re looking to amp up the bubblegum flavor, consider adding a touch of bubblegum extract along with the flavoring. For a visual pop, mix in some small, brightly colored sprinkles or even tiny candy pieces that mimic gumballs. For those who prefer a dairy-free option, simply swap the heavy cream and milk for full-fat coconut milk and a dairy-free alternative for the milk. I encourage you to give this bubblegum ice cream recipe a try – it’s a truly rewarding and delicious adventure for your taste buds!
Frequently Asked Questions:
Can I use store-bought bubblegum flavoring instead of extract?
While a dedicated bubblegum extract is recommended for the most authentic flavor, you can experiment with a small amount of high-quality bubblegum flavoring syrup, like the kind used in snow cones. Start with a teaspoon and taste as you go, as these can be quite potent and may alter the texture if too much is used.
How long does homemade bubblegum ice cream last in the freezer?
When stored properly in an airtight container, your delicious homemade bubblegum ice cream should stay fresh and enjoyable for about 2 to 3 weeks. Beyond that, while still safe to eat, the texture might start to degrade, becoming icier.
Bubblegum Ice Cream
A fun and colorful homemade ice cream bursting with bubblegum flavor and festive sprinkles.
Ingredients
-
2 cups heavy cream
-
1 cup whole milk
-
¾ cup granulated sugar
-
2 teaspoons bubblegum flavoring
-
1 teaspoon vanilla extract
-
¼ teaspoon kosher salt
-
Pink or red food coloring (to taste)
-
½ cup confetti sprinkles, divided
-
1 cup gumballs (for decoration)
Instructions
-
Step 1
In a large bowl, whisk together the heavy cream, whole milk, granulated sugar, bubblegum flavoring, vanilla extract, and kosher salt until the sugar is dissolved. -
Step 2
Add pink or red food coloring a few drops at a time, stirring until the desired bubblegum pink color is achieved. -
Step 3
Stir in ¼ cup of the confetti sprinkles. -
Step 4
Pour the mixture into an ice cream maker and churn according to the manufacturer’s instructions. -
Step 5
During the last few minutes of churning, add the remaining ¼ cup of confetti sprinkles. -
Step 6
Transfer the ice cream to an airtight container, layering with gumballs if desired for decoration, and freeze for at least 6 hours, or until firm.
Important Information
Nutrition Facts (Per Serving)
It is important to consider this information as approximate and not to use it as definitive health advice.
Allergy Information
Please check ingredients for potential allergens and consult a health professional if in doubt.