Easy Strawberry Brownies – Best Fudgy Dessert
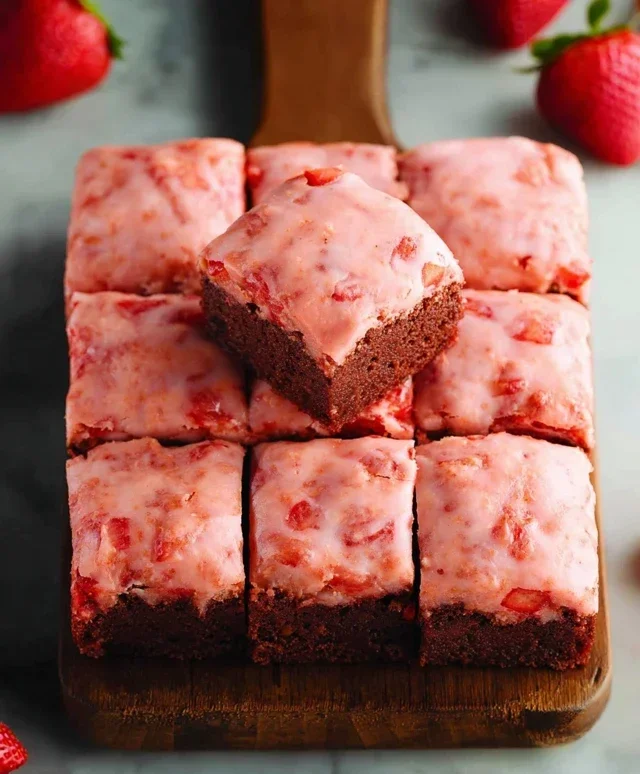
Strawberry Brownies are a delightful twist on a classic dessert, and trust me, they’re about to become your new obsession. Imagin extracte the rich, fudgy goodness of a perfectly baked brownie, but then elevate it with bursts of bright, juicy strawberries. It’s a flavor combination that just works, offering a delightful balance between decadent chocolate and refreshing fruit. People adore brownies for their comforting familiarity and intense chocolate flavor, but adding strawberries introduces a vibrant, unexpected element that cuts through the richness beautifully. What truly makes these strawberry brownies special is the way the sweet and slightly tart strawberries mingle with the deep chocolate, creating a symphony of flavors and textures. They’re perfect for any occasion, from a casual afternoon treat to a show-stopping dessert for guests. Get ready to fall in love with this incredible dessert!
Strawberry Brownies
There are few things more delightful than a perfectly fudgy brownie. But what if we told you we’ve found a way to elevate this classic treat with a burst of sweet, summery strawberry flavor? Introducing our incredible Strawberry Brownies! These aren’t your average brownies; they’re a symphony of rich chocolate and bright fruit, incredibly easy to make, and guaranteed to become a new family favorite. The secret? A clever shortcut that uses a strawberry cake mix to infuse every bite with that irresistible strawberry goodness. We’ve tinkered with this recipe to perfection, and we’re so excited to share it with you. Get ready to impress your friends and family with these vibrant, delicious, and surprisingly simple strawberry brownies.
Ingredients:
Instructions:
1. Prepare Your Baking Pan and Preheat the Oven: Before we even think about mixing ingredients, it’s essential to get your workspace ready. For this recipe, I like to use an 8×8 inch square baking pan. Grease and flour it well, or better yet, line it with parchment paper, leaving an overhang on two sides. This makes lifting the brownies out of the pan a breeze for easy cutting. Next, preheat your oven to 350°F (175°C). This consistent heat is crucial for ensuring your brownies bake evenly and develop that perfect texture.
2. Combine the Brownie Base: In a large mixing bowl, combine the contents of your strawberry cake mix box. You’ll want to add the two large eggs, the 1/3 cup of vegetable or canola oil, and the 1 teaspoon of vanilla extract. Now, it’s time to mix! You can use a whisk or an electric mixer on low speed. Mix until everything is just combined and you have a thick, dough-like batter. Be careful not to overmix; we’re not trying to develop gluten here, just bring everything together. The batter will be quite thick, which is exactly what we want for a fudgy brownie consistency. If you’re using a box mix that doesn’t explicitly state it has pudding in it, you might want to check the ingredients to ensure it will contribute to that desirable dense, fudgy texture.
3. Incorporate the Strawberry Swirl: This is where the magic really happens! In a separate, smaller bowl, whisk together the 3/4 cup of powdered sugar, the 2 tablespoons of strawberry preserves, and the 1 ½ tablespoons of milk. You’re aiming for a smooth, pourable glaze-like consistency. If it seems too thick, add another tiny splash of milk, a teaspoon at a time, until it reaches the right consistency. If you’re feeling adventurous and want an extra creamy, tangy layer, now is the time to add that optional 1 tablespoon of cream cheese. Simply whisk it into the strawberry glaze until it’s smooth and well incorporated. This cream cheese addition adds a subtle richness that really complements the strawberry flavor without making the glaze taste overtly like cream cheese.
4. Assemble and Swirl: Spoon about two-thirds of the thick strawberry brownie batter into your prepared baking pan and spread it evenly. Now, dollop spoonfuls of the strawberry glaze mixture over the brownie batter. Don’t worry about being neat; this is where the artistry comes in! Use a knife or a toothpick to gently swirl the strawberry glaze into the brownie batter. Aim for beautiful marbling effects. You can make figure-eights or random swirls – the more you swirl, the more beautiful the patterns will be when your brownies are baked. It’s okay if some of the glaze sinks into the batter; that just means more strawberry goodness throughout!
5. Bake to Perfection: Carefully place the pan into your preheated oven. Bake for 25-30 minutes, or until a toothpick inserted into the center comes out with moist crum extractbs attached, but not wet batter. It’s important to avoid overbaking, as this can lead to dry brownies. The edges should look set, and the top might have a slightly crackled appearance. Once baked, remove the pan from the oven and let the brownies cool completely in the pan on a wire rack. This cooling step is crucial for them to set up properly and achieve that perfect fudgy texture. Resist the urge to cut into them while they are hot! Once cooled, you can use the parchment paper overhangs to lift the entire brownie slab out of the pan and cut them into squares.
Enjoy these delightful Strawberry Brownies as a sweet treat, a dessert, or a special snack. They are absolutely delicious on their own, but can also be served with a scoop of vanilla ice cream or a dollop of whipped cream for an extra special indulgence.
Conclusion:
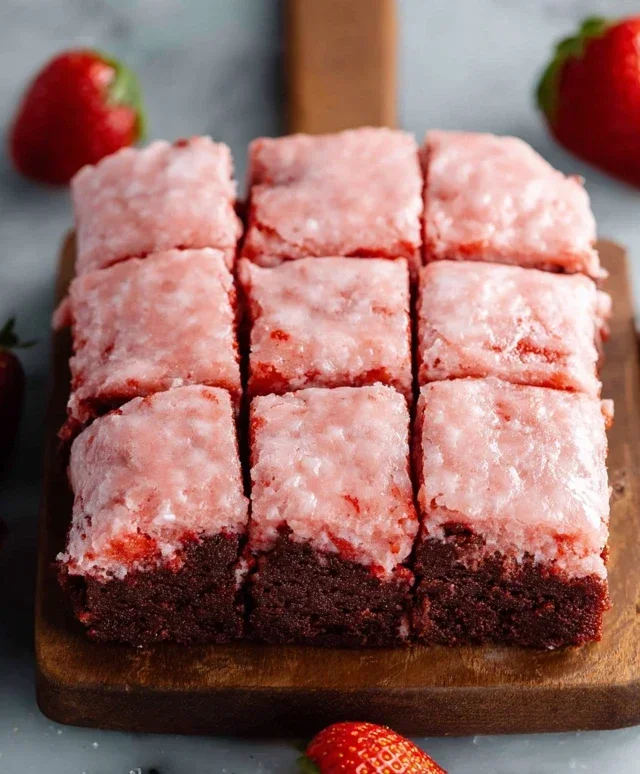
There you have it! These strawberry brownies are a delightful twist on a classic, offering a perfect balance of rich chocolatey goodness and the bright, fresh sweetness of strawberries. They’re wonderfully fudgy, bursting with fruity flavor, and surprisingly easy to whip up, making them an ideal treat for any occasion. Whether you’re a seasoned baker or just starting out, I encourage you to give this recipe a try. You won’t be disappointed by the incredible taste and the joy they bring to your table.
I love serving these strawberry brownies warm with a scoop of vanilla bean ice cream or a dollop of fresh whipped cream. They’re also fantastic on their own, perfect for an afternoon pick-me-up or to share with friends and family. If you’re feeling adventurous, consider adding a swirl of white chocolate ganache on top for an extra touch of elegance, or even a hint of balsamic glaze for a more sophisticated flavor profile. Experiment with different types of chocolate for the brownie base – dark chocolate really makes the strawberry pop!
Frequently Asked Questions:
Can I use frozen strawberries instead of fresh?
Yes, absolutely! If using frozen strawberries, make sure to thaw them completely and drain off any excess liquid before folding them into the batter. This will prevent the brownies from becoming too wet.
How long do these strawberry brownies last?
Stored in an airtight container at room temperature, these brownies should stay fresh and delicious for about 3-4 days. For longer storage, you can refrigerate them, though they might become a bit firmer. They are also freezer-friendly for up to 2 months!
What’s the best way to cut brownies cleanly?
For the cleanest cuts, allow the brownies to cool completely before slicing. Using a sharp, long knife and wiping it clean between cuts will also help achieve neat squares.
Strawberry Brownies
Delicious and easy strawberry brownies made from a strawberry cake mix.
Ingredients
-
1 box strawberry cake mix with pudding in the mix
-
2 large eggs
-
1/3 cup vegetable or canola oil
-
1 teaspoon vanilla extract
-
3/4 cup powdered sugar
-
2 tablespoon strawberry preserves
-
1 ½ tablespoons milk
-
1 tablespoon cream cheese
Instructions
-
Step 1
Preheat oven to 350°F (175°C). Grease and flour a 9×13 inch baking pan. -
Step 2
In a large bowl, combine the strawberry cake mix, eggs, vegetable oil, and vanilla extract. Mix until well combined. -
Step 3
Spread the batter evenly into the prepared baking pan. -
Step 4
In a small bowl, whisk together the powdered sugar, strawberry preserves, milk, and optional cream cheese until smooth. Drizzle this mixture over the brownie batter. -
Step 5
Using a knife or skewer, swirl the glaze into the batter to create a marbled effect. -
Step 6
Bake for 25-30 minutes, or until a toothpick inserted into the center comes out clean. -
Step 7
Let cool completely before cutting into squares.
Important Information
Nutrition Facts (Per Serving)
It is important to consider this information as approximate and not to use it as definitive health advice.
Allergy Information
Please check ingredients for potential allergens and consult a health professional if in doubt.