Best Strawberry Pie Recipe – Sweet Summertime Treat
Strawberry pie is more than just a dessert; it’s a quintessential taste of summer captured in a flaky, buttery crust. There’s a reason why this vibrant dish holds such a special place in our hearts and on our dessert tables. Imagin extracte sinking your fork into a slice, the sweet, slightly tart juices of perfectly ripe strawberries bursting with flavor, complemented by a delicate, often creamy, filling. It’s a celebration of sunshine, a nostalgic trip back to childhood picnics and backyard barbecues. What makes a truly exceptional strawberry pie? It’s the balance – the perfect ratio of sweet fruit to creamy binder, the tender yet crisp pastry, and the sheer joy it brings to everyone who takes a bite. This recipe is designed to deliver exactly that: an unforgettable strawberry pie experience that will have everyone asking for seconds.
Strawberry Pie
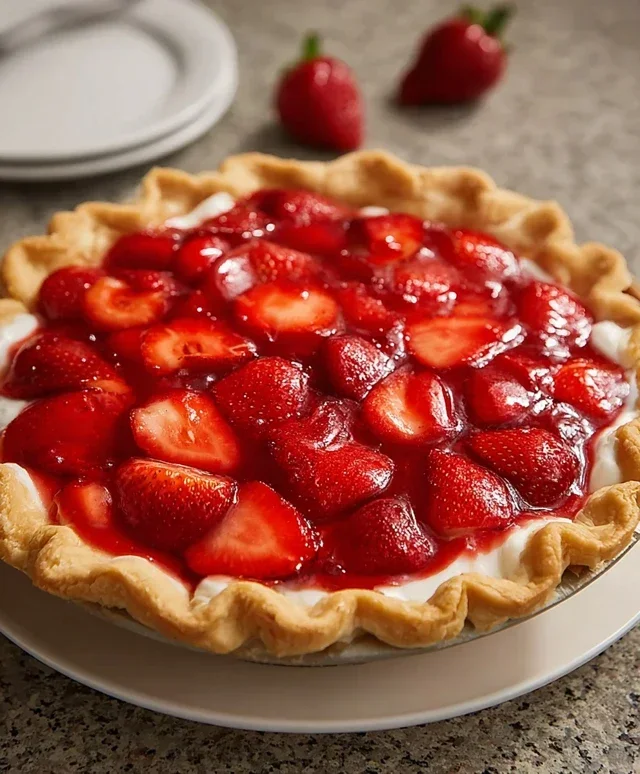
There’s something undeniably special about a fresh strawberry pie. The vibrant ruby-red filling, bursting with the sweet and slightly tart essence of summer, encased in a flaky, golden crust – it’s a dessert that evokes pure joy. This recipe is my go-to for a reason: it’s simple to make, requires no baking (besides pre-baking the crust), and delivers a truly spectacular result. Whether you’re a seasoned baker or just starting out, you’ll find this strawberry pie a delightful and rewarding creation. It’s perfect for potlucks, family gatherings, or simply as a treat to brighten your day.
The beauty of this pie lies in its straightforward approach. We’ll be creating a luscious, jelly-like filling that beautifully showcases the fresh strawberries. The combination of cornstarch and strawberry jello creates a perfectly set, glossy filling that holds its shape without being overly stiff. The pre-baked crust ensures a delightful crunch that contrasts wonderfully with the soft, juicy berries. Let’s get started on this easy yet impressive dessert!
Ingredients:
Cooking Instructions:
1. Prepare the Luscious Strawberry Filling: In a medium saucepan, we’ll start by whisking together the sugar and cornstarch. It’s important to get these dry ingredients well combined before adding any liquid. This helps prevent lumps from forming later on. Once they’re nicely mixed, gradually whisk in the 1 1/2 cups of water until smooth. We want a completely lump-free mixture before we apply any heat.
2. Thicken the Base: Now, place the saucepan over medium heat. Stir constantly as the mixture begin extracts to heat up. You’ll notice it gradually thickening. Continue to stir and cook until the mixture comes to a gentle boil and has thickened significantly – it should be like a clear, thickened syrup. This cooking process is crucial for activating the cornstarch and ensuring a smooth, stable filling. Once it reaches this thickened stage, remove the saucepan from the heat immediately.
3. Infuse with Jello Flavor: While the cornstarch mixture is still hot, carefully add the 3 oz package of strawberry jello. Whisk it in vigorously until all the jello powder is completely dissolved. The heat from the cornstarch mixture will help the jello melt quickly and evenly. You should have a beautifully colored, smooth liquid now. Let this mixture cool for about 10-15 minutes. We don’t want it piping hot when we add the strawberries, but it should still be warm enough to help set the jello.
4. Assemble the Pie: Gently fold in the sliced strawberries into the slightly cooled cornstarch and jello mixture. Be delicate here; we want the strawberries to remain relatively intact and not get mashed. The goal is to coat them evenly with the filling. Once the strawberries are well distributed throughout the mixture, carefully pour the entire contents into your pre-baked 9-inch pie crust. Spread it out evenly with a spatula, ensuring no air pockets are trapped.
5. Chill to Perfection: This is where patience comes in! Cover the pie loosely with plastic wrap (try not to let the plastic touch the filling directly, if possible, to avoid creating condensation marks). Place the pie in the refrigerator and allow it to chill for at least 4 hours, or preferably overnight. This chilling time is essential for the filling to set completely, creating that beautiful, firm texture that makes strawberry pie so enjoyable. The longer it chills, the firmer and more sliceable your pie will be.
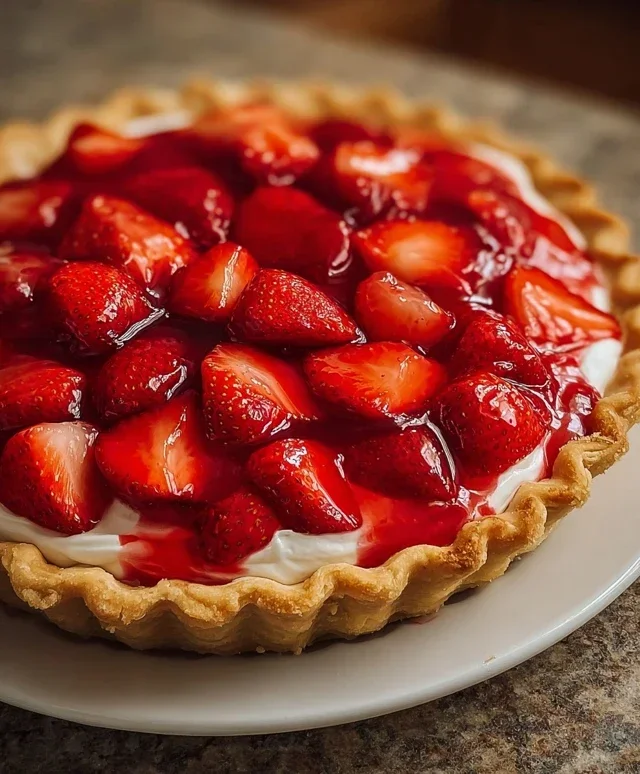
Once the pie is thoroughly chilled and set, it’s ready to be served. You can enjoy it as is, or for an extra touch of indulgence, top each slice with a dollop of whipped cream or a scoop of vanilla ice cream. The combination is simply divine! The vibrant freshness of the strawberries, combined with the sweet, slightly tart filling and the crisp crust, makes this strawberry pie a true crowd-pleaser. It’s a taste of summer in every bite, and I’m confident you’ll love making and eating it as much as I do. Enjoy this delightful homemade treat!
Conclusion:
There you have it! This delicious strawberry pie recipe is a winner for so many reasons. It’s incredibly straightforward, even for begin extractner bakers, and delivers that perfect balance of sweet, slightly tart strawberries nestled in a flaky, golden crust. The vibrant red filling and fresh berry topping make it a stunning centerpiece for any occasion, from a casual family dinner to a special holiday gathering. I truly believe this recipe will become a staple in your baking repertoire.
To elevate your experience, consider serving this delightful strawberry pie with a dollop of freshly whipped cream, a scoop of vanilla bean ice cream, or even a drizzle of sweetened condensed milk. For a creative twist, you can experiment with adding a hint of lemon zest to the filling for an extra bright note, or even a sprinkle of finely chopped mint for a refreshing counterpoint. Don’t be afraid to play with it and make it your own!
I wholeheartedly encourage you to give this strawberry pie a try. It’s a truly rewarding bake that brings smiles to faces. Gather your ingredients, put on your favorite apron, and get ready to create a masterpiece!
Frequently Asked Questions about Strawberry Pie:
Q: Can I use frozen strawberries instead of fresh for this strawberry pie?
A: Absolutely! While fresh strawberries offer the best flavor and texture, frozen strawberries are a perfectly acceptable substitute. If using frozen, there’s no need to thaw them completely. Just drain off any excess liquid before adding them to the pie filling. You might need to bake the pie slightly longer to ensure the filling thickens properly.
Q: How can I prevent the bottom crust from becoming soggy?
A: A soggy bottom crust is the bane of many pie bakers! For this strawberry pie, ensure your filling is cooked down enough to thicken before pouring it into the crust. Baking the pie on a lower oven rack or placing it on a preheated baking sheet can also help cook the bottom crust more thoroughly. Some bakers also swear by brushing the bottom crust with a lightly beaten egg white before adding the filling to create a barrier.
Strawberry Pie
A refreshing and easy strawberry pie made with fresh strawberries and strawberry jello.
Ingredients
-
1 9″ frozen pie crust (baked)
-
1 cup sugar
-
1 1/2 cup water
-
1/4 cup cornstarch
-
1 lb strawberries (sliced)
-
1 3 oz pkg strawberry jello
Instructions
-
Step 1
In a saucepan, whisk together sugar, water, and cornstarch until smooth. -
Step 2
Cook over medium heat, stirring constantly, until the mixture thickens and boils. Boil for 1 minute. -
Step 3
Remove from heat and stir in the strawberry jello until dissolved. -
Step 4
Let the mixture cool for about 15-20 minutes, stirring occasionally. -
Step 5
Gently fold in the sliced strawberries. -
Step 6
Pour the strawberry mixture into the baked pie crust. -
Step 7
Refrigerate for at least 4 hours, or until firm.
Important Information
Nutrition Facts (Per Serving)
It is important to consider this information as approximate and not to use it as definitive health advice.
Allergy Information
Please check ingredients for potential allergens and consult a health professional if in doubt.