BEST Classic Tiramisu Recipe – Easy Italian Dessert
BEST Classic Italian Tiramisu Recipe: Ah, tiramisu! Just the name conjures up images of a rich, creamy, coffee-kissed dessert that’s utterly irresistible. It’s a dish that whispers of Italian kitchens, of generations perfecting a balance of sweet, bitter, and creamy. This isn’t just any dessert; it’s an experience. What is it about this iconic layered masterpiece that captivates us all? Perhaps it’s the ethereal lightness of the mascarpone cream, the delightful soak of espresso-laden ladyfingers, or the dusting of cocoa that adds a final, sophisticated flourish. It’s a symphony of textures and flavors, a dance between indulgence and elegance. We love it because it feels both celebratory and comforting, a perfect ending to any meal. Today, I’m sharing with you my tried-and-true BEST Classic Italian Tiramisu Recipe, the one that brings smiles and requests for seconds every single time. Get ready to create your own slice of Italian heaven.
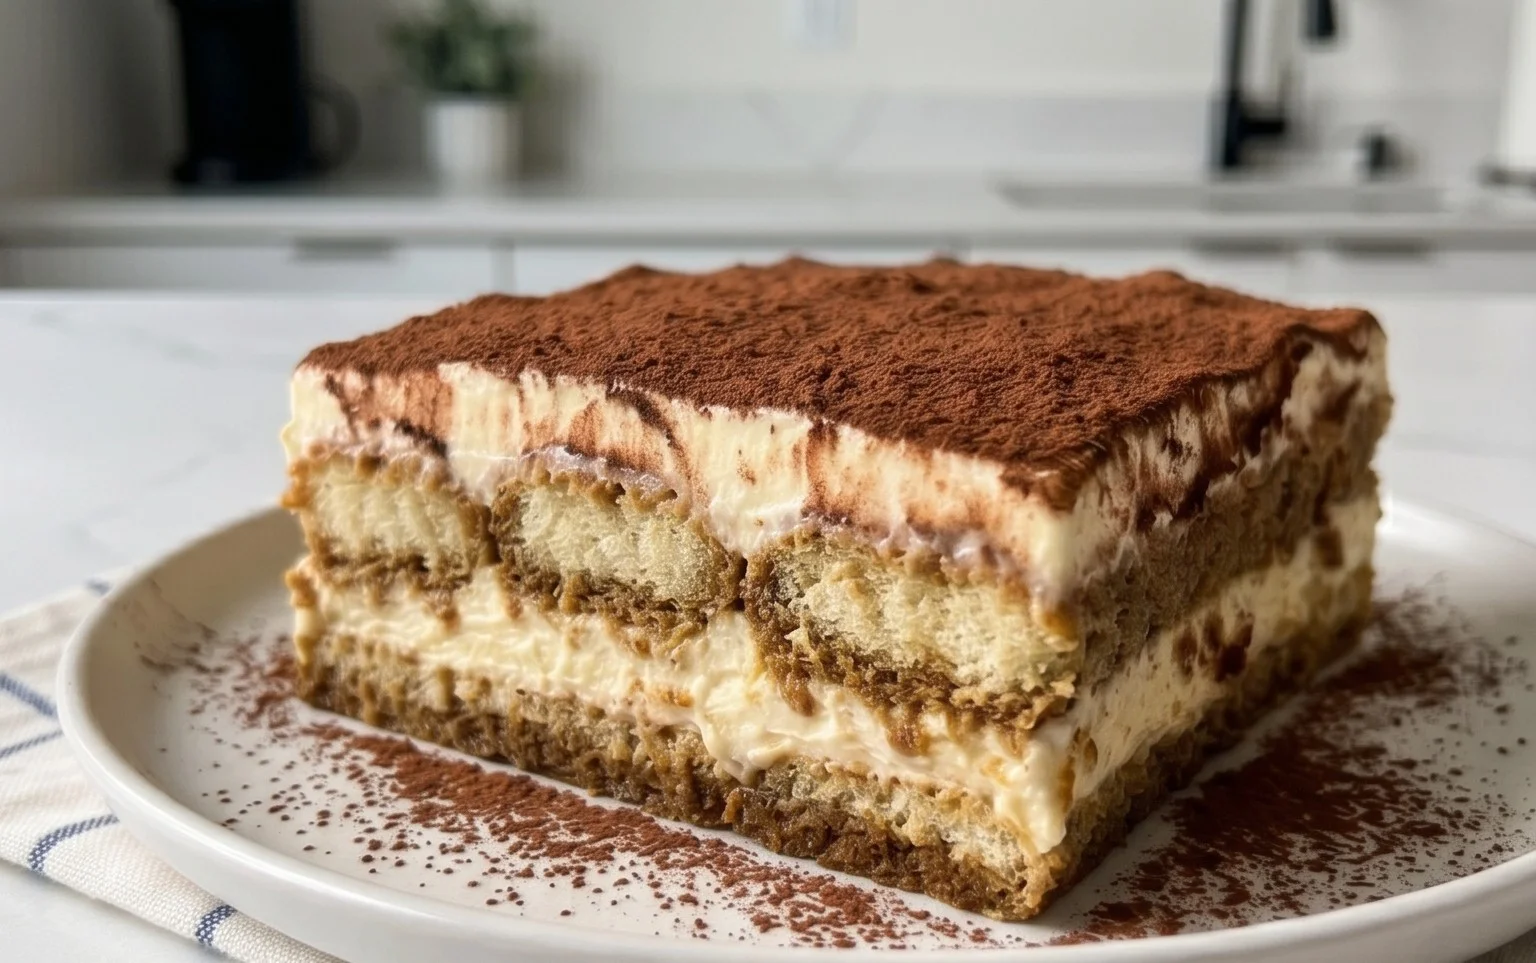
BEST Classic Italian Tiramisu Recipe
There are few desserts as universally loved and undeniably delicious as Tiramisu. Its name, meaning “pick me up” or “cheer me up” in Italian, perfectly describes the delightful experience of savoring its layers of creamy mascarpone, coffee-soaked ladyfingers, and a whisper of cocoa. While many variations exist, this recipe aims for the purest, most classic Italian Tiramisu. It’s a recipe that requires a little attention to detail, but the reward is a truly spectacular dessert that will impress your friends and family. We’ll be focusing on the rich, custardy cream and the perfect balance of coffee and sweetness.
Ingredients:
Instructions:
Preparing the Mascarpone Cream Base
1. In a medium heatproof bowl, whisk together the 4 egg yolks and 2/3 cup of granulated sugar. Place this bowl over a saucepan of barely simmering water (a double boiler method). Ensure the bottom of the bowl does not touch the water. Whisk constantly for about 5-8 minutes, until the mixture thickens and becomes pnon-alcoholic ale yellow and airy. This process, known as tempering the eggs, gently cooks the yolks, making them safe to consume and creating a stable, luscious base for our cream. The mixture should reach a temperature of around 160°F (71°C) if you have a thermometer. Once it has thickened nicely, remove the bowl from the heat.
2. Gently fold in the cold mascarpone cheese into the tempered egg yolk mixture. Use a spatula and fold carefully to avoid deflating the air you’ve just incorporated. Continue folding until the mascarpone is just combined and the mixture is smooth and creamy. It’s crucial that the mascarpone is cold, as this helps maintain the structure of the cream. Don’t overmix, as this can make the mascarpone seize up. Stir in the 1 teaspoon of vanilla extract and 1/4 teaspoon of salt. This mascarpone cream is the heart of your Tiramisu, so take your time and ensure it’s perfectly blended.
Creating the Whipped Cream (or Meringue)
3. Now, we have two excellent options for creating the lightness in our Tiramisu cream: whipped heavy cream or whipped egg whites. For a richer, more classic Tiramisu, I prefer using heavy cream. In a separate, clean bowl (ensure it’s free of any grease), whip the 1 1/2 cups of chilled heavy cream until stiff peaks form. This means when you lift the whisk or beaters, the cream holds its shape and doesn’t droop. If you opt for egg whites (the more traditional Italian method, though requiring a bit more technique), whisk the 4 egg whites in a very clean bowl until foamy. Gradually add the divided 1/3 cup of sugar (one portion at a time) while continuing to whisk, until stiff, glossy peaks form, creating a meringue. Be absolutely sure your egg whites are free from any yolk, as this will prevent them from whipping properly.
4. Now, gently fold the whipped cream (or meringue) into the mascarpone mixture. Again, use a spatula and fold with a light hand, preserving as much air as possible. You want to incorporate it until just combined, with no streaks of white remaining. This step is what gives Tiramisu its signature airy yet creamy texture. The goal is a light, fluffy, yet stable cream that will hold its shape. Don’t worry if there are a few tiny wisps of mascarpone still visible; it’s better to under-mix slightly than to over-mix and lose the airiness.
Assembling Your Masterpiece
5. Prepare your coffee. Ensure it’s strong and brewed to your liking. Let it cool to room temperature; hot coffee will make your ladyfingers too mushy. Pour the room temperature coffee into a shallow dish or bowl. Quickly dip each ladyfinger into the coffee, one at a time, for just a second or two. You want them to absorb some coffee, but not become completely saturated, otherwise, your Tiramisu will be watery. Arrange a single layer of these dipped ladyfingers at the bottom of your serving dish (a 9×13 inch dish is ideal). You might need to break some ladyfingers to fit snugly.
6. Once you have a solid layer of coffee-soaked ladyfingers, generously spread half of your mascarpone cream mixture over the top, smoothing it out evenly with your spatula. Repeat the process: dip another layer of ladyfingers in coffee and arrange them over the cream. Then, spread the remaining mascarpone cream mixture evenly over the second layer of ladyfingers. Ensure the top layer is smooth and even, creating a beautiful canvas for the final dusting.
Chilling and Serving
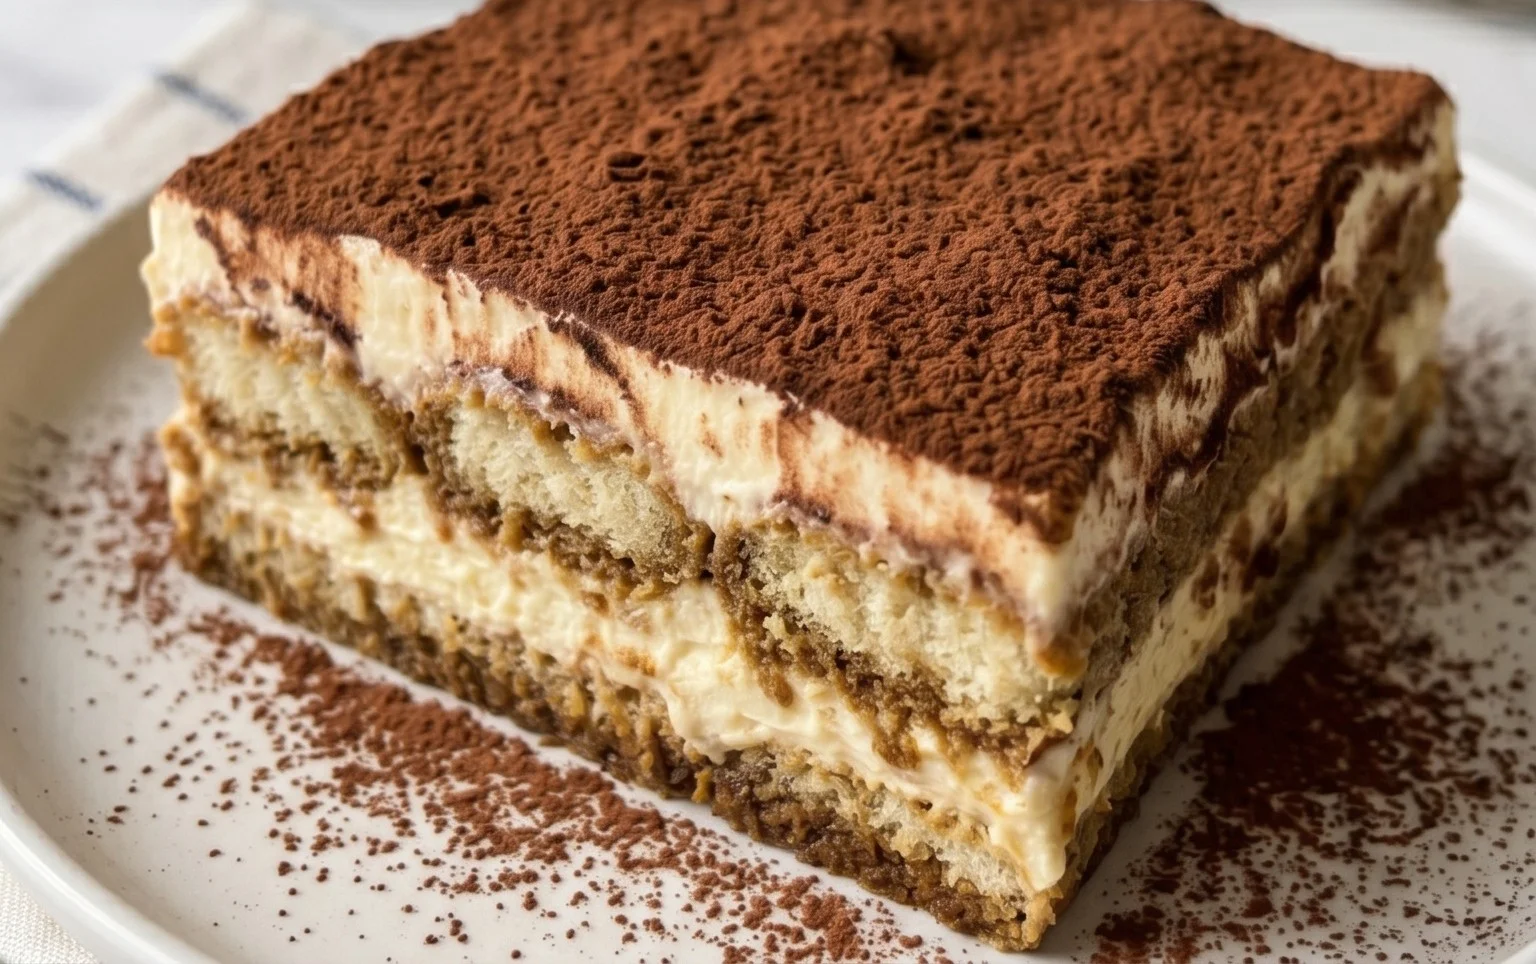
7. Cover the dish tightly with plastic wrap, making sure it doesn’t touch the surface of the cream. Refrigerate for at least 4-6 hours, or preferably overnight. This chilling time is crucial for the flavors to meld and for the Tiramisu to set properly, allowing the ladyfingers to soften further and the cream to firm up. Just before serving, dust the top generously with cocoa powder using a fine-mesh sieve. This final touch provides a beautiful visual appeal and a subtle bitter contrast to the sweet, creamy layers. Slice and serve chilled. Enjoy your homemade classic Italian Tiramisu!
Conclusion:
You’ve now got the blueprint for creating the BEST Classic Italian Tiramisu Recipe that will impress everyone, from seasoned dessert connoisseurs to first-time tasters. This recipe truly shines because of its perfect balance of rich, creamy mascarpone, robust espresso-soaked ladyfingers, and a delicate dusting of cocoa – it’s a symphony of textures and flavors that truly defines a classic. The beauty of this dessert lies in its elegant simplicity and the rewarding feeling you get when you see those layers come together, transforming into something utterly divine. For serving, I always recommend chilling it for at least 4 hours, or even overnight, to allow the flavors to meld beautifully. A light sprinkle of extra cocoa powder or some shaved dark chocolate just before serving adds a professional touch.
Don’t be afraid to experiment! While the classic is perfect, you can explore variations like adding a splash of Marsala grape juice or rum extract to the espresso, or even infusing the mascarpone mixture with a hint of lemon zest for a brighter note. The most important thing is to have fun and enjoy the process. I truly encourage you to try this recipe. It’s more accessible than you might think, and the results are absolutely worth it. Get ready to experience the magic of authentic Italian tiramisu in your own kitchen!
Frequently Asked Questions:
Can I make Tiramisu ahead of time?
Absolutely! In fact, making tiramisu ahead of time is highly recommended. Chilling it for at least 4 hours, and ideally overnight, allows the ladyfingers to soften perfectly and the flavors to meld together beautifully. This makes it an ideal dessert for parties or gatherings as you can prepare it well in advance.
What kind of coffee should I use for the ladyfingers?
A strong, brewed coffee is essential. Espresso is the traditional choice and provides the most authentic and intense coffee flavor. However, if you don’t have an espresso machine, you can use very strong brewed coffee, such as a dark roast, or even instant espresso powder dissolved in hot water. Ensure it’s cooled before dipping the ladyfingers.
Can I use a different type of cookie instead of ladyfingers?
While ladyfingers (savoiardi) are traditional and offer a unique light, airy texture that absorbs liquid well, you can experiment with alternatives if needed. Soft sponge cake or even pound cake cut into strips can work. However, be mindful that they might absorb liquid differently and could alter the final texture of your tiramisu.
BEST Classic Italian Tiramisu Recipe
An authentic and delicious classic Italian Tiramisu recipe, made with creamy mascarpone, espresso-soaked ladyfingers, and a hint of cocoa.
Ingredients
-
16 oz Mascarpone cheese, cold from the fridge
-
4 egg yolks
-
2/3 cup granulated sugar
-
1 tsp vanilla extract
-
1/4 tsp salt
-
1 1/2 cup heavy cream, chilled
-
30-36 ladyfingers
-
1 1/2 cup strong black coffee, room temperature
-
2 tbsp cocoa powder to dust
Instructions
-
Step 1
In a heatproof bowl set over a saucepan of simmering water (bain-marie), whisk together the egg yolks and granulated sugar until pale and thickened. Continue whisking for about 5-7 minutes, until the mixture is warm to the touch. Remove from heat and stir in the vanilla extract and salt. Let it cool slightly. -
Step 2
In a separate chilled bowl, whip the heavy cream until stiff peaks form. Gently fold the whipped cream into the slightly cooled egg yolk mixture until just combined. -
Step 3
Quickly dip each ladyfinger into the room temperature strong black coffee. Be careful not to soak them for too long, as they can become soggy. Arrange a single layer of dipped ladyfingers in the bottom of your serving dish. -
Step 4
Spread half of the mascarpone cream mixture evenly over the ladyfinger layer. -
Step 5
Repeat the process with another layer of coffee-dipped ladyfingers, followed by the remaining mascarpone cream mixture. -
Step 6
Cover the dish with plastic wrap and refrigerate for at least 4 hours, or preferably overnight, to allow the flavors to meld and the tiramisu to set. -
Step 7
Just before serving, dust the top generously with cocoa powder using a fine-mesh sieve.
Important Information
Nutrition Facts (Per Serving)
It is important to consider this information as approximate and not to use it as definitive health advice.
Allergy Information
Please check ingredients for potential allergens and consult a health professional if in doubt.