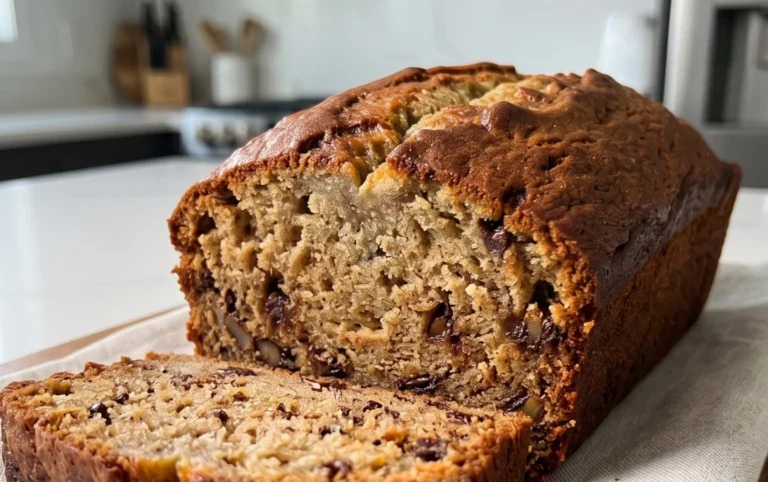
Easy Zucchini Biscuits – Soft & Delicious Recipe
Zucchini biscuits are a delightful surprise that I absolutely adore, and I’m thrilled to share this recipe with you today. Have you ever found yourself staring at a surplus of zucchini from your garden or the farmer’s market and wondered what magical creations you could whip up? Well, look no further! These aren’t your average, everyday biscuits. What makes these zucchini biscuits so incredibly special is their ability to transform a humble vegetable into something utterly irresistible. They boast a tender, fluffy interior with a hint of sweetness and a subtly savory note from the zucchini, all encased in a perfectly golden crust. They’re the ideal companion to a hearty breakfast, a comforting soup, or even just as a satisfying snack. Forget those dry, crum extractbly disappointments; these zucchini biscuits are destined to become a staple in your kitchen.

Zucchini Biscuits
Welcome to a delightful way to use up that abundant zucchini from your garden or grocery haul! These Zucchini Biscuits are not your average bland bread. They are savory, fluffy, and packed with incredible flavor thanks to the combination of fresh zucchini, sharp cheese, and aromatic herbs. They’re perfect as a side to your favorite soup or stew, or even enjoyed on their own as a satisfying snack. The beauty of these biscuits is how forgiving they are. Even if you’re new to baking, you’ll find these easy to whip up and incredibly rewarding. Let’s get started on creating these delicious little flavor bombs!
Ingredients:
Cooking Instructions:
Preparation is Key: Grating Your Zucchini
The first crucial step is preparing your zucchini. You’ll want to wash and trim the ends off your zucchini. Then, using the large holes of a box grater, shred the zucchini. You should have about 1 1/4 cups of shredded zucchini. If you find yourself with a little more, that’s perfectly fine – a heaping cup is a good guideline. Now, this next part is important for achieving the best texture in your biscuits: squeezing out excess moisture. Place the shredded zucchini in a clean kitchen towel or a few layers of paper towels. Gently but firmly squeeze out as much liquid as you possibly can. This step prevents your biscuits from becoming dense and gummy. Set the dried shredded zucchini aside.
Combining the Dry Ingredients: The Foundation of Flavor
In a large mixing bowl, we’ll combine all of our dry ingredients. Start with the 2 cups of flour. To this, add the 1 1/2 tablespoons of baking powder, which is essential for that light and airy rise we’re looking for in a good biscuit. Next, add 1 teaspoon of salt for general seasoning, and then the 1/4 teaspoon of black pepper. If you like a little warmth, this is also the time to add those optional dashes of red pepper flakes for a subtle kick. Don’t forget the 1/2 teaspoon of garlic powder – this adds a wonderful savory depth that complements the cheese and zucchini beautifully. Whisk these ingredients together thoroughly to ensure everything is evenly distributed. This ensures that every bite of your biscuit will have the perfect balance of flavors.
Incorporating the Fat: Creating Tender Layers
Now it’s time to add the fat, which is crucial for flaky biscuits. Add the 1/4 cup of butter, cut into small cubes, directly to the dry ingredients. Using a pastry blender, two knives, or even your fingertips, work the butter into the flour mixture until it resembles coarse crum extractbs. You want to see some pea-sized pieces of butter remaining. These little pockets of butter will melt during baking, creating steam and those desirable flaky layers. Work quickly to prevent the butter from melting too much from the warmth of your hands.
Adding the Wet Ingredients and Flavor Boosters: The Heart of the Biscuit
In a separate, smaller bowl, whisk together the wet ingredients. You’ll need 1 cup of whole milk and 1 large egg. Whisk them until they are well combined. Now, let’s add the stars of our flavor show! Stir the 1 1/2 cups of shredded cheese into the dry ingredients. I love using a sharp cheddar blend for its fantastic flavor, but feel free to experiment with Parmesan for nuttiness or mozzarella for that lovely stringy pull. Finally, add your 1/4 cup of sliced scallions. These add a delicate oniony flavor and a pop of color. If you’re using the optional red pepper, make sure it’s incorporated here too.
Bringin extractg it All Together: Gentle Mixing is Key
Now, create a well in the center of your dry ingredients and pour in the whisked milk and egg mixture. Using a fork or a spatula, gently mix everything together until just combined. Be careful not to overmix! Overmixing develops the gluten in the flour, which can lead to tough biscuits. You’ll likely still see some dry bits of flour, and that’s perfectly okay. The dough will be shaggy and somewhat sticky. This is exactly what we want for tender, fluffy biscuits.
Shaping and Baking: The Final Transformation
Turn the shaggy dough out onto a lightly floured surface. Gently pat or fold the dough a few times – just enough to bring it together into a cohesive mass. Avoid kneading. You want to preserve as much airiness as possible. Pat the dough into a circle or rectangle about 3/4 to 1 inch thick. You can then use a biscuit cutter or a sharp knife to cut out your biscuits. Place the biscuits onto a baking sheet lined with parchment paper, leaving a little space between them.
Now, preheat your oven to 400 degrees Fahrenheit (200 degrees Celsius). Bake the biscuits for 12-15 minutes, or until they are golden brown on top and on the bottom. The exact time will depend on your oven and the size of your biscuits. While they are baking, you can prepare the optional garlic butter topping. Simply mix 3 tablespoons of melted butter with a teaspoon of garlic paste or 1/2 teaspoon of garlic powder. Once the biscuits are out of the oven, brush them generously with the garlic butter topping. The aroma is incredible! Let them cool slightly before serving. These Zucchini Biscuits are best enjoyed warm, straight from the oven. They are a wonderful savory treat that you’ll want to make again and again. Enjoy!

Conclusion:
I hope you’re as excited about these Zucchini Biscuits as I am! They truly are a fantastic way to use up that abundant summer zucchini while creating something utterly delicious. The combination of flaky, tender biscuit with the subtle sweetness and moisture from the grated zucchini is simply divine. They’re perfect for breakfast, brunch, or as a delightful side dish that elevates any meal. The best part is how versatile they are. Whether you’re craving a classic buttery biscuit or looking to get a little more creative, these zucchini biscuits deliver.
Serve them warm, slathered with butter, honey, or even a dollop of jam. They’re also wonderful alongside a hearty stew, a comforting soup, or a plate of scrambled eggs. Don’t be afraid to experiment with variations! Adding a sprinkle of cheddar cheese, some chopped chives, or a pinch of red pepper flakes can transform these simple biscuits into something truly special. Give these Zucchini Biscuits a try; I promise you won’t be disappointed. They’re a delightful, wholesome addition to any baker’s repertoire.
Frequently Asked Questions:
Can I use shredded zucchini that has been squeezed dry?
Yes, absolutely! Squeezing out excess moisture from your shredded zucchini is a great tip to prevent the biscuits from becoming too wet and dense. This will help ensure a lighter, fluffier texture. Make sure to wring out as much liquid as possible.
What’s the best way to store leftover Zucchini Biscuits?
Leftover Zucchini Biscuits can be stored in an airtight container at room temperature for up to two days, or in the refrigerator for up to four days. To reheat, simply warm them in a toaster oven or a conventional oven at a low temperature (around 300°F or 150°C) until warmed through.
Can I add other vegetables to these biscuits?
You certainly can! While zucchini is fantastic, feel free to experiment. Finely grated carrots or a small amount of finely chopped bell peppers could also be lovely additions, though they might alter the moisture content slightly, so adjust accordingly.
Zucchini Biscuits
Deliciously savory zucchini biscuits with cheese and scallions, perfect as a side dish or light snack.
Ingredients
-
1 1/4 cups shredded zucchini
-
2 cups flour
-
1 1/2 TBS baking powder
-
1 teaspoon salt
-
1/4 teaspoon black pepper
-
1/2 teaspoon garlic powder
-
1/4 cup butter, cut into small cubes
-
1 cup whole milk
-
1 egg
-
1 1/2 cups shredded cheese
-
1/4 cup sliced scallions
Instructions
-
Step 1
Preheat oven to 400°F (200°C). Line a baking sheet with parchment paper. -
Step 2
In a large bowl, whisk together flour, baking powder, salt, black pepper, garlic powder, and optional red pepper. -
Step 3
Cut in the butter using a pastry blender or your fingers until the mixture resembles coarse crumbs. -
Step 4
Stir in the shredded zucchini, shredded cheese, and sliced scallions. -
Step 5
In a separate bowl, whisk together the milk and egg. Add this wet mixture to the dry ingredients and stir until just combined. Do not overmix. -
Step 6
Drop spoonfuls of the dough onto the prepared baking sheet. -
Step 7
Bake for 15 minutes, or until golden brown and cooked through. -
Step 8
Serve warm, optionally with garlic butter topping.
Important Information
Nutrition Facts (Per Serving)
It is important to consider this information as approximate and not to use it as definitive health advice.
Allergy Information
Please check ingredients for potential allergens and consult a health professional if in doubt.