Peppermint Brownies-Irresistible Fudgy Delight
Peppermint Brownies are more than just a dessert; they’re a delightful journey to cozy winter evenings and festive gatherings. If you’ve ever craved that perfect blend of rich, fudgy chocolate and invigorating peppermint, you’re in for a treat. These aren’t your average brownies. We’re talking about a decadent base that melts in your mouth, infused with a cooling burst of peppermint that cuts through the sweetness beautifully. It’s that magical combination that makes people truly fall in love with these Peppermint Brownies. They’re perfect for holiday baking, a special occasion, or simply when you need a little pick-me-up. What makes them truly special is the harmonious balance – not too sweet, not too minty, but just right. Get ready to elevate your brownie game with this irresistible recipe!
Peppermint Brownies
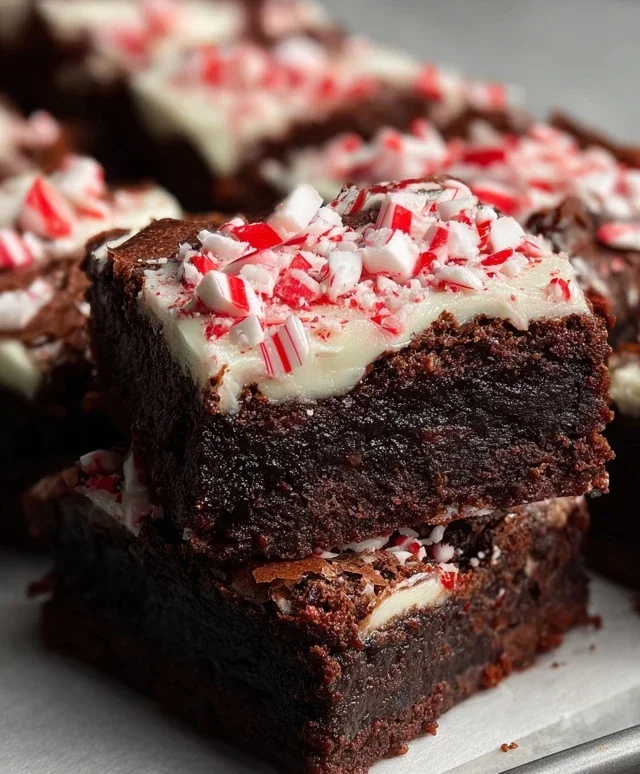
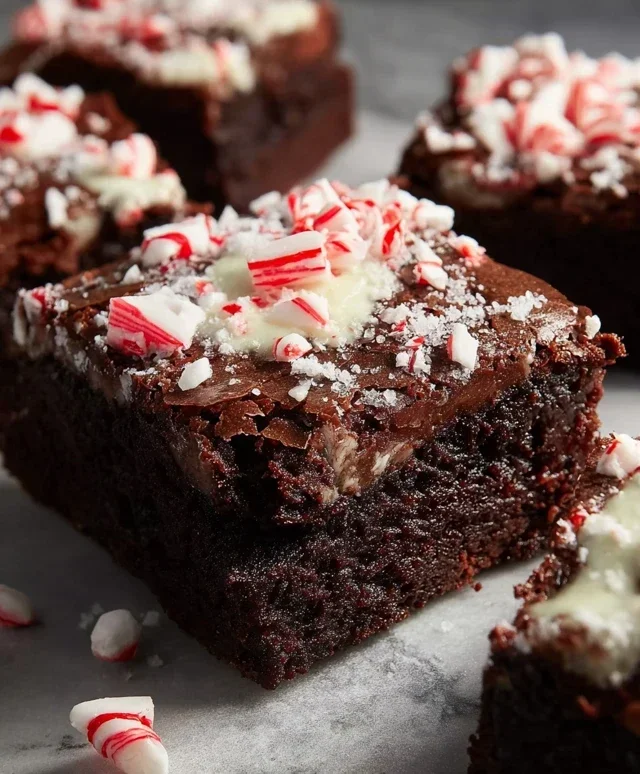
There’s something truly magical about a perfectly fudgy brownie, and when you add the invigorating zing of peppermint, you’ve got a holiday-worthy treat that’s surprisingly easy to make. These Peppermint Brownies are my go-to when I need a little festive cheer, or frankly, just a serious chocolate craving fix. The rich, dense brownie base is perfectly complemented by a sweet, creamy peppermint frosting and the delightful crunch of crushed candy canes. Forget those boxed mixes; this recipe delivers a deeply satisfying chocolate flavor and a texture that’s simply irresistible.
Let’s get started on creating these little bites of peppermint-chocolate heaven. I’ve found that using good quality cocoa powder really makes a difference in the final flavor of the brownies, so opt for one you love. And don’t be shy with the peppermint extract – it’s the star of the show here!
Ingredients:
Instructions:
Baking the Brownie Base
1. Preheat and Prepare: First things first, preheat your oven to 350°F (175°C). I like to lightly grease an 8×8 inch baking pan and then line it with parchment paper, leaving a slight overhang on two sides. This overhang acts as a handy sling, making it super easy to lift the finished brownies out of the pan for cooling and cutting. Don’t skip this step – it’s a game-changer for clean brownie removal.
2. Melt and Mix the Wet Ingredients: In a medium saucepan over low heat, melt the ½ cup of unsalted butter. Once melted, remove it from the heat and stir in the ¾ cup of granulated sugar until well combined. It might look a little grainy, and that’s perfectly fine. Let this mixture cool slightly for a minute or two. Then, whisk in the two large eggs, one at a time, making sure each is fully incorporated before adding the next. Finally, stir in the 1 teaspoon of vanilla extract. This forms the luscious base of our brownie batter.
3. Incorporate Dry Ingredients: To the wet ingredients, sift in the ⅓ cup of cocoa powder, ½ cup of all-purpose flour, and ¼ teaspoon of salt. Gently fold these dry ingredients into the wet mixture using a spatula until just combined. Be careful not to overmix at this stage. Overmixing can lead to tough brownies, and we’re aiming for that perfect chewy, fudgy texture. You should have a thick, glossy batter at this point.
4. Bake to Perfection: Pour the brownie batter evenly into your prepared baking pan. Spread it out with your spatula to ensure an even layer. Bake for 20-25 minutes, or until a toothpick inserted into the center comes out with moist crum extractbs attached, not wet batter. It’s crucial not to overbake them, as this will dry them out. I usually check mine around the 20-minute mark. Once baked, remove the pan from the oven and let the brownies cool completely in the pan on a wire rack. This cooling period is essential before frosting. Patience is key here; trying to frost warm brownies is a recipe for a melty mess!
Crafting the Peppermint Frosting
5. Whip up the Frosting: While the brownies are cooling, let’s make the frosting. In a medium bowl, combine the 2 tablespoons of softened unsalted butter with the 1 cup of powdered sugar. Start by mixing them together on low speed (or with a whisk) until they’re just combined to avoid a sugar cloud. Then, gradually add 1-2 tablespoons of milk, one tablespoon at a time, until you reach a smooth, spreadable consistency. You want it thick enough to hold its shape but still easy to spread. Stir in the ½ teaspoon of peppermint extract. If you like a festive pink hue, add 2-3 drops of red food coloring and mix until evenly distributed.
Assembling Your Masterpiece
6. Frost and Decorate: Once the brownies are completely cool, it’s time for the fun part! Spread the peppermint frosting evenly over the top of the cooled brownies. Use an offset spatula for a smooth finish, or create some swirls for a more rustic look. Finally, sprinkle the ¼ cup of crushed candy canes generously over the frosting. The candy canes add a delightful crunch and a burst of extra peppermint flavor. Let the frosting set slightly for about 15-30 minutes before cutting the brownies into squares. These Peppermint Brownies are best stored in an airtight container at room temperature for up to 3 days. Enjoy every delicious bite!
Conclusion:
There you have it – your guide to making absolutely irresistible Peppermint Brownies! These aren’t just any brownies; they’re a delightful fusion of rich, fudgy chocolate and the refreshing zing of peppermint, creating a truly memorable treat. The simplicity of this recipe means you can whip up a batch of these decadent delights in no time, perfect for satisfying a sudden craving or impressing guests. Whether you’re a seasoned baker or just starting out, this recipe is incredibly forgiving and consistently yields spectacular results. Their fudgy texture and vibrant peppermint flavor make them a perfect holiday indulgence, but honestly, they’re delicious enough to enjoy year-round!
For serving, I love to see them dusted with a little powdered sugar or a drizzle of white chocolate. They are also fantastic alongside a tall glass of cold milk or a steaming mug of hot chocolate. Feeling adventurous? Consider adding a few chocolate chips or a swirl of peppermint extract into the batter for an extra burst of flavor. Don’t be afraid to experiment! I truly encourage you to give these Peppermint Brownies a try. I’m confident they’ll become a new favorite in your baking repertoire.
Frequently Asked Questions about Peppermint Brownies:
Q: Can I use a different type of chocolate for these brownies?
Absolutely! While semi-sweet or dark chocolate chips are recommended for that classic fudgy texture and balanced flavor, feel free to experiment. Milk chocolate will result in a sweeter brownie, while a higher percentage cocoa chocolate will offer a more intense, bitter chocolate experience. Just ensure you’re using good quality chocolate for the best flavor.
Q: How should I store these peppermint brownies?
To keep your brownies fresh and delicious, store them in an airtight container at room temperature for up to 3-4 days. If you live in a warmer climate or want them to last longer, you can refrigerate them, but let them come to room temperature before serving for the best texture. You can also freeze them for up to 2-3 months!
Peppermint Brownies
Decadent chocolate brownies infused with refreshing peppermint and topped with a creamy peppermint frosting and crushed candy canes.
Ingredients
-
½ cup unsalted butter
-
¾ cup granulated sugar
-
2 large eggs
-
1 teaspoon vanilla extract
-
⅓ cup cocoa powder
-
½ cup all-purpose flour
-
¼ teaspoon salt
-
2 tablespoons unsalted butter, softened
-
1 cup powdered sugar
-
1-2 tablespoons milk
-
½ teaspoon peppermint extract
-
2-3 drops red food coloring (optional)
-
¼ cup crushed candy canes
Instructions
-
Step 1
Preheat oven to 350°F (175°C). Grease and flour an 8×8 inch baking pan. -
Step 2
In a large bowl, melt ½ cup unsalted butter. Stir in ¾ cup granulated sugar until combined. -
Step 3
Beat in 2 large eggs one at a time, then stir in 1 teaspoon vanilla extract. -
Step 4
In a separate bowl, whisk together ⅓ cup cocoa powder, ½ cup all-purpose flour, and ¼ teaspoon salt. -
Step 5
Gradually add the dry ingredients to the wet ingredients, mixing until just combined. Do not overmix. -
Step 6
Spread the batter evenly into the prepared baking pan. Bake for 20-25 minutes, or until a toothpick inserted into the center comes out with moist crumbs. -
Step 7
While the brownies are cooling, prepare the frosting. In a medium bowl, beat 2 tablespoons softened unsalted butter until creamy. -
Step 8
Gradually beat in 1 cup powdered sugar, alternating with 1-2 tablespoons milk, until the frosting is smooth and spreadable. -
Step 9
Stir in ½ teaspoon peppermint extract and optional 2-3 drops red food coloring. If the frosting is too thick, add more milk, one teaspoon at a time. If too thin, add more powdered sugar. -
Step 10
Spread the frosting evenly over the cooled brownies. Sprinkle with ¼ cup crushed candy canes. -
Step 11
Let the frosting set for about 15-20 minutes before cutting into squares.
Important Information
Nutrition Facts (Per Serving)
It is important to consider this information as approximate and not to use it as definitive health advice.
Allergy Information
Please check ingredients for potential allergens and consult a health professional if in doubt.