Decadent Triple-Layer Chocolate Mint Squares Recipe
Triple-layer chocolate mint squares are a dream come true for any dessert lover, especially if you’re like me and have a soft spot for the classic combination of rich chocolate and cool, refreshing mint. This isn’t just any chocolate treat; it’s an experience! Imagin extracte sinking your teeth into a symphony of textures and flavors: a crisp, crum extractbly base, a velvety smooth chocolate mint filling, and a decadent, glossy chocolate ganache topping. It’s this layered complexity that elevates these triple-layer chocolate mint squares from a simple dessert to a showstopper. They’re perfect for holidays, special occasions, or just because you deserve a truly delicious indulgence. The satisfying bite, the intense chocolate hit balanced by that invigorating minty zing – it’s pure bliss, and I can’t wait to share how I create these magical triple-layer chocolate mint squares with you.
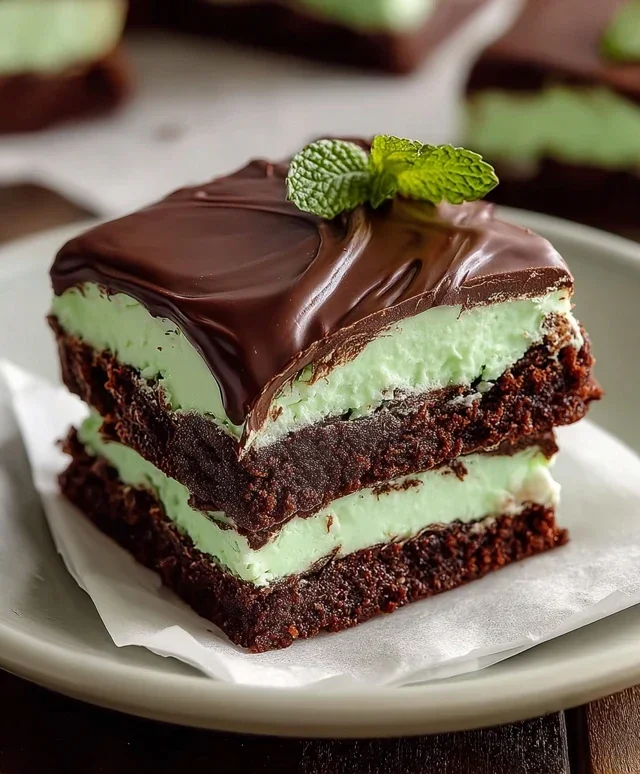
Triple-Layer Chocolate Mint Squares
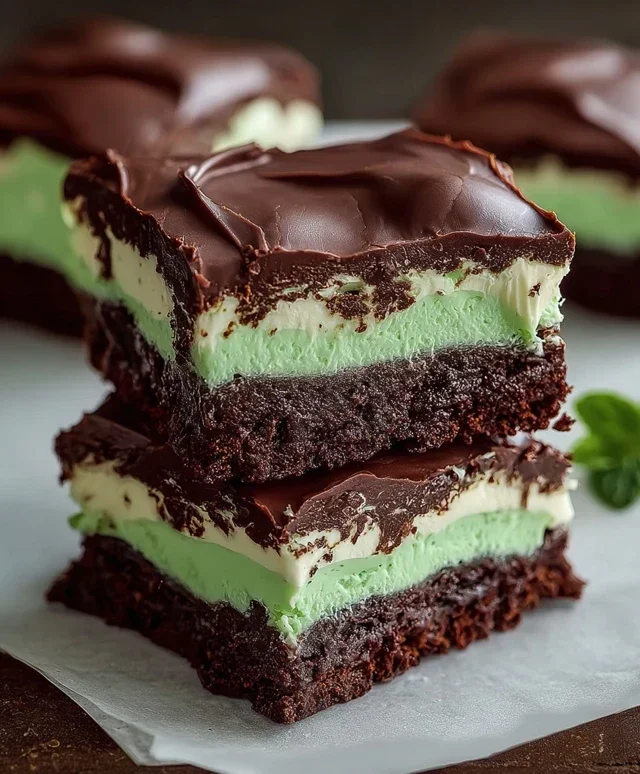
Prepare your taste buds for an explosion of pure chocolate and refreshing mint with these decadent Triple-Layer Chocolate Mint Squares. This recipe might seem a little involved, but trust me, the layered perfection and utterly satisfying flavor are worth every step. We’re creating three distinct but harmonious layers: a rich chocolate brownie base, a creamy mint-chocolate filling, and a smooth chocolate ganache topping. It’s the ultimate treat for any chocolate lover, especially those who enjoy that invigorating minty twist.
Ingredients:
The Rich Chocolate Base
Let’s start with the foundation of our delicious squares. This layer is essentially a fudgy brownie, intensely chocolatey and perfectly chewy.
1. Preheat your oven to 350 degrees Fahrenheit (175 degrees Celsius). Grease and flour a 9×13 inch baking pan, or line it with parchment paper, leaving an overhang on the sides for easy lifting later. This will be crucial for getting those beautiful squares out without any fuss.
2. In a medium saucepan over low heat, melt 1 cup of salted butter and 4 oz. of semi-sweet chocolate chips. Stir constantly until completely smooth and combined. Once melted, remove the saucepan from the heat and stir in 2 cups of granulated sugar and 2 teaspoons of vanilla extract. This combination will create a wonderfully glossy chocolate mixture.
3. Now, it’s time to incorporate the eggs. Add the 4 large eggs, one at a time, whisking well after each addition until the mixture is smooth and well incorporated. Don’t be tempted to overmix; just ensure each egg is fully blended.
4. Gently fold in 1 ½ cups of all-purpose flour until just combined. Be careful not to overwork the batter at this stage, as this can lead to a tougher brownie. A few streaks of flour are okay; they’ll disappear during baking. Pour this rich, dark batter into your prepared baking pan and spread it evenly. Bake for 20-25 minutes, or until a toothpick inserted into the center comes out with moist crum extractbs attached. It’s important not to overbake this layer, as we want it to remain wonderfully fudgy. Let the brownie layer cool completely in the pan while you prepare the next layer.
The Creamy Mint-Chocolate Filling
This second layer brings the refreshing mint flavor and a delightful creamy texture that contrasts beautifully with the fudgy base.
1. In a large bowl, beat ¾ cup of softened salted butter with an electric mixer until light and fluffy. This is key to a smooth and airy filling.
2. Gradually add 3 cups of powdered sugar, mixing on low speed until incorporated, then increasing the speed to medium-high. You want a smooth, creamy consistency.
3. Add 1 tablespoon of heavy whipping cream and 1 teaspoon of peppermint extract. Mix again until well combined.
4. Now for the color! Add 10 drops of green food coloring and mix until you achieve a vibrant, uniform green hue. The color is purely for aesthetics, but it really makes these squares pop!
5. Once the brownie base has cooled completely, spread this luscious mint filling evenly over the top. Use an offset spatula or the back of a spoon to ensure a smooth and even layer.
The Silky Chocolate Ganache Topping
Our final layer is a decadent chocolate ganache, adding a touch of sophisticated sweetness and a beautiful glossy finish.
1. In a heatproof bowl, place 3 cups of semi-sweet chocolate chips.
2. In a small saucepan, heat ½ cup of heavy whipping cream and 2 tablespoons of butter over medium heat until the butter has melted and the cream is just begin extractning to simmer around the edges. Do not boil.
3. Pour the hot cream and butter mixture over the chocolate chips. Let it sit for about 5 minutes without stirring to allow the chocolate to soften.
4. After 5 minutes, gently whisk the mixture, starting from the center and working your way outwards, until the ganache is completely smooth and glossy. This process might take a minute or two, but be patient – the result is worth it.
5. Pour the warm ganache over the mint filling, tilting the pan to ensure it covers the entire surface evenly. Smooth the top with an offset spatula.
Allow the ganache to set at room temperature for about 30 minutes, then refrigerate the entire pan for at least 2-3 hours, or until the layers are firm. Once chilled, lift the entire slab out of the pan using the parchment paper overhang. Cut into squares using a sharp knife, wiping the knife clean between cuts for neat edges. Enjoy these irresistible Triple-Layer Chocolate Mint Squares!
Conclusion:
I hope you’re as excited about these triple-layer chocolate mint squares as I am! This recipe is truly a winner because it combines rich, decadent chocolate with a refreshing hint of mint in a beautifully layered treat. It’s perfect for any occasion, from a simple afternoon pick-me-up to a show-stopping dessert for your next party. The different textures, from the chewy brownie-like base to the creamy mint filling and the silky chocolate ganache, create an incredibly satisfying bite.
Serving these squares is a breeze. They are fantastic on their own, but for an extra special touch, consider topping them with a dollop of whipped cream and a few chocolate shavings or a sprinkle of crushed candy canes during the holidays. For variations, feel free to experiment! You could swap the mint extract for peppermint for a bolder flavor, or even add a swirl of caramel to the chocolate layer. Don’t be afraid to get creative!
I truly encourage you to give these triple-layer chocolate mint squares a try. They are surprisingly easy to make, and the results are absolutely worth it. You’ll be amazed at how impressive they look and how delicious they taste. Happy baking!
Frequently Asked Questions:
Can I make these ahead of time?
Absolutely! These triple-layer chocolate mint squares are actually best made a day in advance. This allows the layers to set properly, making them easier to cut and ensuring the flavors meld together beautifully. Store them in an airtight container in the refrigerator.
What kind of chocolate should I use for the ganache?
For the best flavor and texture, I recommend using a good quality semi-sweet or dark chocolate for the ganache. Using chocolate chips can sometimes result in a less smooth ganache, so opting for a chocolate bar that you chop yourself will yield superior results.
How should I store leftover squares?
Leftover triple-layer chocolate mint squares should be stored in an airtight container in the refrigerator. They will stay fresh for up to 4-5 days. For the best eating experience, allow them to sit at room temperature for about 15-20 minutes before serving to soften slightly.
Triple-Layer Chocolate Mint Squares
Decadent chocolate mint squares with three distinct layers for a delightful treat.
Ingredients
-
1 cup salted butter
-
4 oz. semi-sweet chocolate chips
-
2 cups granulated sugar
-
2 teaspoons vanilla extract
-
1 ½ cups all-purpose flour
-
4 large eggs
-
¾ cup salted butter, softened
-
3 cups powdered sugar
-
1 tablespoon heavy whipping cream
-
1 teaspoon peppermint extract
-
10 drops green food coloring
-
3 cups semi-sweet chocolate chips
-
2 tablespoons butter
-
½ cup heavy whipping cream
Instructions
-
Step 1
Preheat oven to 350°F (175°C). Grease and flour a 9×13 inch baking pan. -
Step 2
For the first layer: Melt 1 cup salted butter and 4 oz. semi-sweet chocolate chips together. Stir in 2 cups granulated sugar and 2 teaspoons vanilla extract. Add 1 ½ cups all-purpose flour and 4 large eggs, mixing until just combined. -
Step 3
Spread the first layer evenly into the prepared baking pan. Bake for 20 minutes, or until a toothpick inserted into the center comes out clean. -
Step 4
For the second layer: While the first layer bakes, beat ¾ cup softened salted butter until creamy. Gradually add 3 cups powdered sugar, 1 tablespoon heavy whipping cream, 1 teaspoon peppermint extract, and 10 drops green food coloring until smooth and well combined. -
Step 5
Once the first layer is baked and slightly cooled, spread the mint layer evenly over it. -
Step 6
For the third layer: Melt 3 cups semi-sweet chocolate chips with 2 tablespoons butter and ½ cup heavy whipping cream over low heat or in the microwave, stirring until smooth. Pour this chocolate ganache over the mint layer. -
Step 7
Chill the squares in the refrigerator for at least 2 hours, or until firm, before cutting into squares.
Important Information
Nutrition Facts (Per Serving)
It is important to consider this information as approximate and not to use it as definitive health advice.
Allergy Information
Please check ingredients for potential allergens and consult a health professional if in doubt.