Cookie Ice Cream Sandwiches Chipwich Style
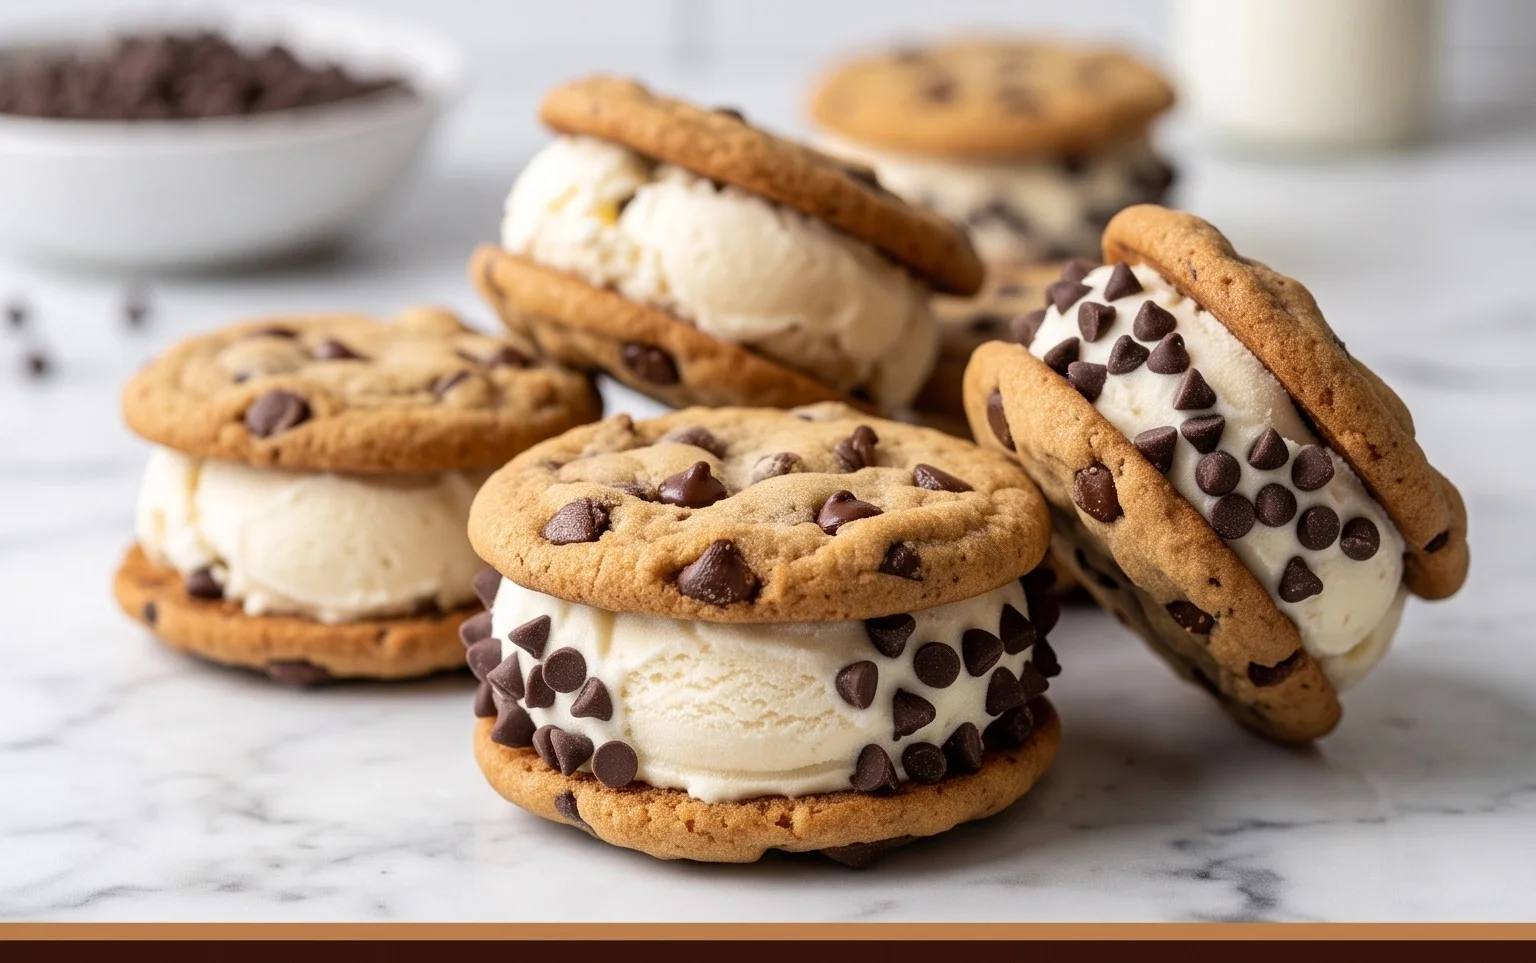
Cookie Ice Cream Sandwiches (Like a Chipwich!) – who can resist the ultimate frozen treat that blends the chewy goodness of a cookie with the creamy delight of ice cream? We’re talking about those iconic Cookie Ice Cream Sandwiches, the kind that transport you back to carefree summer days and pure, unadulterated joy. These aren’t just any desserts; they’re a nostalgic hug in every bite, a perfect marriage of textures and flavors that has captured hearts for generations. What makes them so special? It’s the delightful contrast: the slightly crisp edges of a warm cookie giving way to the yielding, cool ice cream nestled within, often with a sprinkle of crunchy chocolate chips for that extra bit of magic. Whether you’re recreating a beloved childhood memory or forgin extractg a new one, these Cookie Ice Cream Sandwiches are guaranteed to be a crowd-pleaser.
The Ultimate Cookie Ice Cream Sandwiches (Just Like a Chipwich!)
There are few things as universally loved as a perfectly baked cookie and the refreshing chill of ice cream. Now, imagin extracte combining those two delights into one glorious creation: the cookie ice cream sandwich. Forget those store-bought imposters; we’re talking about homemade perfection, inspired by the iconic Chipwich. This recipe delivers a chewy, slightly crisp chocolate chip cookie that forms the ideal vehicle for your favorite ice cream. The combination of textures and temperatures is simply irresistible, making these a guaranteed crowd-pleaser for any occasion, from casual summer gatherings to birthday parties. Get ready to impress yourself and everyone around you with these delightful frozen treats.
Ingredients:
Crafting Your Perfect Cookie Dough
The foundation of any great ice cream sandwich is a fantastic cookie. We’re aiming for a cookie that has enough structure to hold its shape, but is also wonderfully soft and chewy in the center. To achieve this, we’ll start by whisking together our dry ingredients. In a medium bowl, combine the all-purpose flour, cornstarch, baking soda, and salt. The cornstarch is a secret weapon here, contributing to that desirable chewy texture. Give these a good whisk to ensure everything is evenly distributed.
In a separate, larger bowl, cream together the softened unsalted butter with both the packed brown sugar and granulated sugar. Using softened butter is crucial; it should yield slightly when pressed but not be greasy. Creaming these ingredients together until light and fluffy incorporates air, which will help our cookies bake up with a pleasant texture. This process typically takes about 2-3 minutes with an electric mixer or a bit longer by hand.
Next, we’ll add our wet ingredients to the creamed butter and sugar mixture. Beat in the large egg and the egg yolk, one at a time, ensuring each is fully incorporated before adding the next. The extra egg yolk adds richness and helps bind the dough, contributing to a chewier cookie. Stir in the pure vanilla extract for that classic comforting aroma and flavor.
Gradually add the dry ingredients to the wet ingredients, mixing on low speed or by hand until just combined. Be careful not to overmix at this stage, as overmixing can lead to tough cookies. Finally, gently fold in the 1 and 1/4 cups of mini semi-sweet chocolate chips. These will be distributed throughout your cookie, offering little bursts of chocolatey goodness in every bite.
Baking Those Glorious Cookies
Now it’s time to get these cookies ready for their icy destiny. Preheat your oven to 375°F (190°C). Line baking sheets with parchment paper or silicone baking mats. This prevents sticking and makes for easy cleanup.
Using a cookie scoop (about 1.5 tablespoons) or a spoon, drop rounded portions of dough onto the prepared baking sheets, leaving about 2 inches between each cookie to allow for spreading. You want your cookies to be a uniform size so they’ll sandwich together nicely. For a perfectly circular cookie, you can gently roll the dough balls between your palms before placing them on the sheet.
Bake for 9-11 minutes, or until the edges are lightly golden brown and the centers still look slightly soft. They will continue to cook on the baking sheet as they cool. The key here is to underbake them slightly. We want them soft enough to be chewy, not crisp and brittle, as they will be holding ice cream.
Once baked, let the cookies cool on the baking sheets for about 5 minutes before transferring them to a wire rack to cool completely. This cooling process is vital. If you try to assemble your ice cream sandwiches with warm cookies, your ice cream will melt instantly, creating a rather messy situation. Patience is a virtue, especially when delicious frozen desserts are involved!
Assembling Your Masterpieces
Once your cookies are completely cool, it’s time for the fun part: assembling your ice cream sandwiches! Take your softened vanilla ice cream (or your chosen flavor) out of the freezer and let it sit at room temperature for about 5-10 minutes. You want it to be scoopable and spreadable, but not so soft that it’s dripping everywhere. This slightly softened state makes it much easier to work with.
On the flat side of one cookie, place a generous scoop of ice cream. Use the back of a spoon or a small spatula to spread the ice cream evenly towards the edges of the cookie. Aim for a thickness that complements the cookie, roughly ¼ to ½ inch.
Carefully place another cookie on top of the ice cream, flat side down, and gently press down until the ice cream reaches the edges of both cookies. You’ve now created your very own ice cream sandwich!
The Finishing Touches
For that authentic Chipwich experience, and for added deliciousness, you can coat the edges of your ice cream sandwiches. Prepare your chosen coating in a shallow dish. This could be mini chocolate chips, colorful sprinkles, or finely chopped nuts. Press the sides of the assembled ice cream sandwich into the coating, rotating to ensure it adheres evenly. This not only looks fantastic but adds another layer of texture and flavor to your creation.
Once assembled and coated, place the ice cream sandwiches on a baking sheet lined with parchment paper. Transfer the baking sheet to the freezer and freeze for at least 1-2 hours, or until the ice cream is firm. This step is crucial to allow the ice cream to set properly, preventing your sandwiches from falling apart when you take your first glorious bite.
Enjoy your homemade cookie ice cream sandwiches! They are best enjoyed within a few weeks of making, stored tightly wrapped in the freezer. Get creative with your cookie flavors and ice cream combinations – the possibilities are endless!
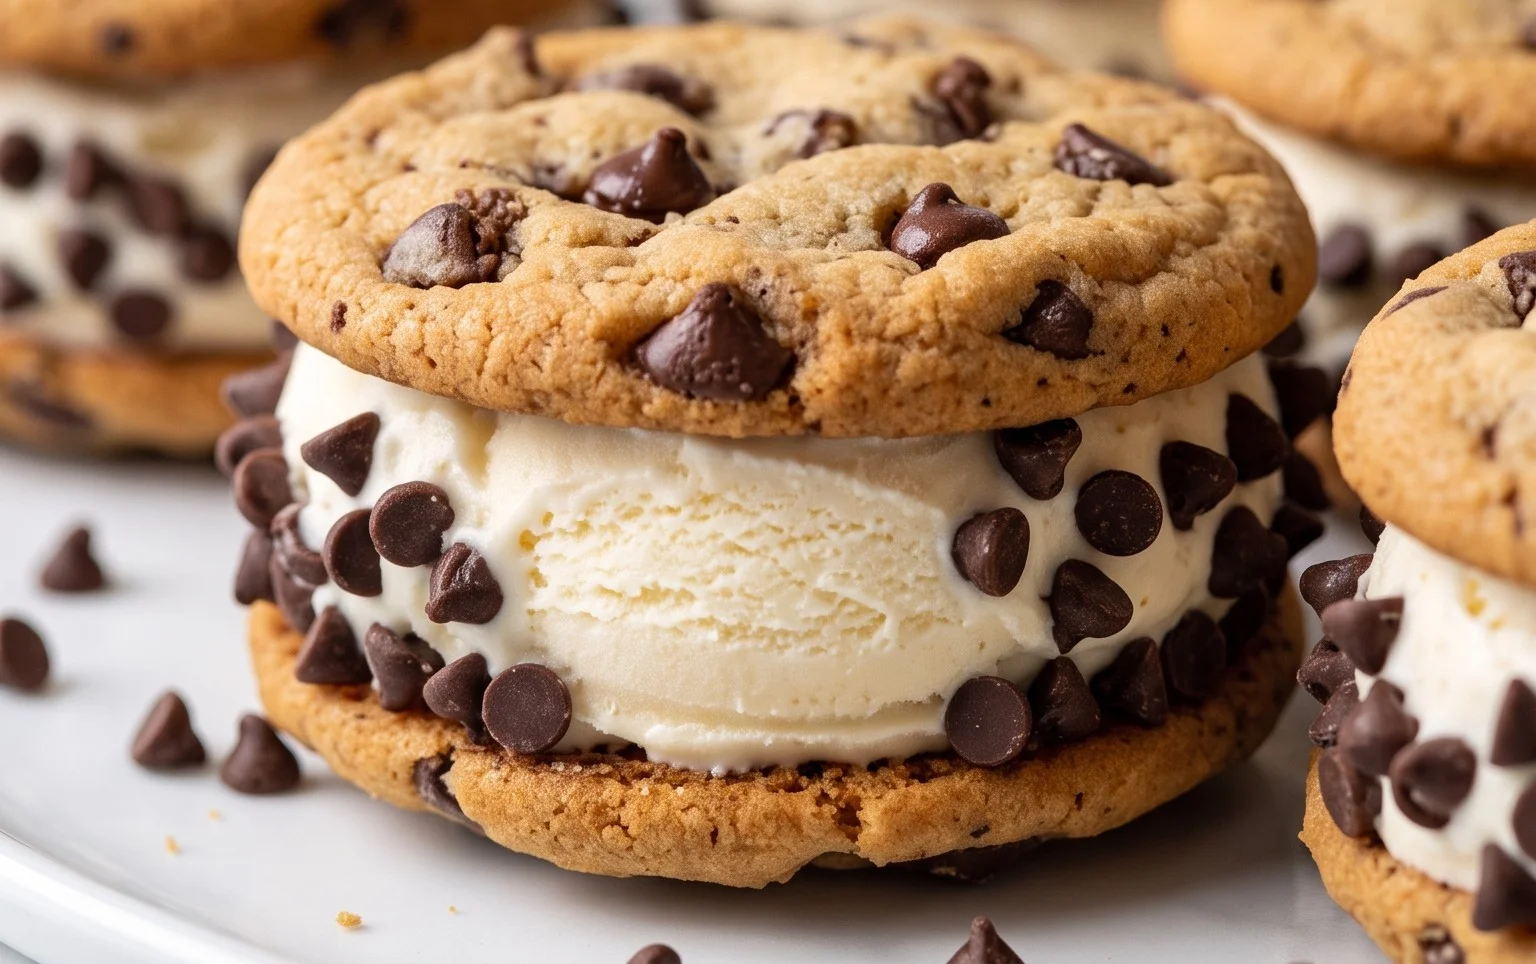
Conclusion:
And there you have it – the ultimate guide to creating your very own delicious Cookie Ice Cream Sandwiches, just like those beloved Chipwich treats! This recipe is a guaranteed winner because it’s incredibly versatile, surprisingly simple to execute, and delivers pure, unadulterated joy in every bite. The combination of warm, chewy cookies and cold, creamy ice cream is simply irresistible, making these a perfect dessert for any occasion, from casual backyard barbecues to more festive gatherings.
To truly elevate your Cookie Ice Cream Sandwiches, consider these serving suggestions. Roll the edges of your ice cream layer in chopped nuts like pistachios or walnuts, sprinkles for a fun pop of color, or even mini chocolate chips for extra texture. You can also experiment with different ice cream flavors – mint chocolate chip, cookies and cream, or a fruity sorbet would all be fantastic. Don’t be afraid to get creative with your cookie choices too; sugar cookies, oatmeal raisin, or even peanut butter cookies can transform this classic into something entirely new. I truly encourage you to give this recipe a try; it’s a fantastic way to impress friends and family, or simply to treat yourself to something truly special.
Frequently Asked Questions:
Can I make the cookies ahead of time?
Absolutely! You can bake the cookies up to two days in advance and store them in an airtight container at room temperature once they’ve completely cooled. This makes assembly a breeze when you’re ready to make your Cookie Ice Cream Sandwiches.
What’s the best way to cut them?
For clean cuts, it’s best to let the ice cream soften slightly at room temperature for about 5-10 minutes before slicing. Use a sharp, sturdy knife and wipe it clean between each cut for the neatest results.
Can I freeze the assembled ice cream sandwiches?
Yes, you can! Once assembled, wrap each Cookie Ice Cream Sandwich individually in plastic wrap and then place them in a freezer-safe container or bag. They’ll keep for a couple of weeks and are perfect for having on hand for a quick treat.
Cookie Ice Cream Sandwiches (Like a Chipwich!)
Classic homemade ice cream sandwiches with soft chocolate chip cookies and creamy vanilla ice cream, reminiscent of your favorite store-bought treat.
Ingredients
-
2 and 1/4 cups (281g) all-purpose flour (spooned & leveled)
-
1 and 1/2 teaspoons cornstarch
-
1 teaspoon baking soda
-
1/2 teaspoon salt
-
3/4 cup (12 Tablespoons; 170g) unsalted butter, softened to room temperature
-
3/4 cup (150g) packed light or dark brown sugar
-
1/2 cup (100g) granulated sugar
-
1 large egg + 1 egg yolk, at room temperature
-
2 teaspoons pure vanilla extract
-
1 and 1/4 cups (225g) mini semi-sweet chocolate chips
-
3 cups (about 540g) vanilla ice cream (or your desired flavor)
-
1 cup mini chocolate chips (180g), sprinkles (150g), or finely chopped nuts (100g)
Instructions
-
Step 1
Whisk together the flour, cornstarch, baking soda, and salt in a medium bowl. Set aside. -
Step 2
In a large bowl, cream together the softened butter, brown sugar, and granulated sugar until light and fluffy. -
Step 3
Beat in the egg, egg yolk, and vanilla extract until well combined. -
Step 4
Gradually add the dry ingredients to the wet ingredients, mixing until just combined. Stir in the mini semi-sweet chocolate chips. -
Step 5
Scoop rounded tablespoons of dough onto parchment-lined baking sheets, leaving about 2 inches between cookies. Flatten each scoop slightly with your palm. -
Step 6
Bake for 12-15 minutes, or until the edges are golden brown and the centers are still slightly soft. -
Step 7
Let the cookies cool on the baking sheets for a few minutes before transferring them to a wire rack to cool completely. -
Step 8
Once cookies are completely cool, soften the ice cream slightly so it’s scoopable but not melted. Spread a generous amount of ice cream onto the flat side of one cookie. -
Step 9
Top with another cookie, flat side down, and gently press to form a sandwich. Roll the exposed ice cream edges in your chosen toppings (mini chocolate chips, sprinkles, or chopped nuts). -
Step 10
Wrap each sandwich tightly in plastic wrap and freeze for at least 1-2 hours, or until firm.
Important Information
Nutrition Facts (Per Serving)
It is important to consider this information as approximate and not to use it as definitive health advice.
Allergy Information
Please check ingredients for potential allergens and consult a health professional if in doubt.