Crispy Chewy Chocolate Chip Cookies Recipe
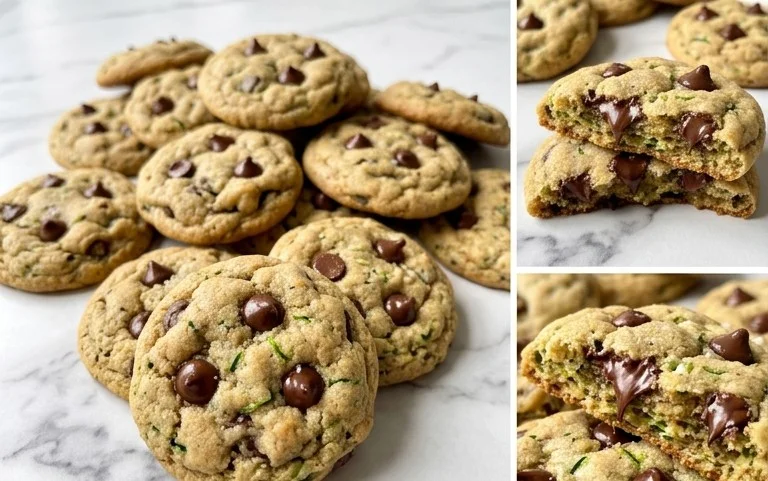
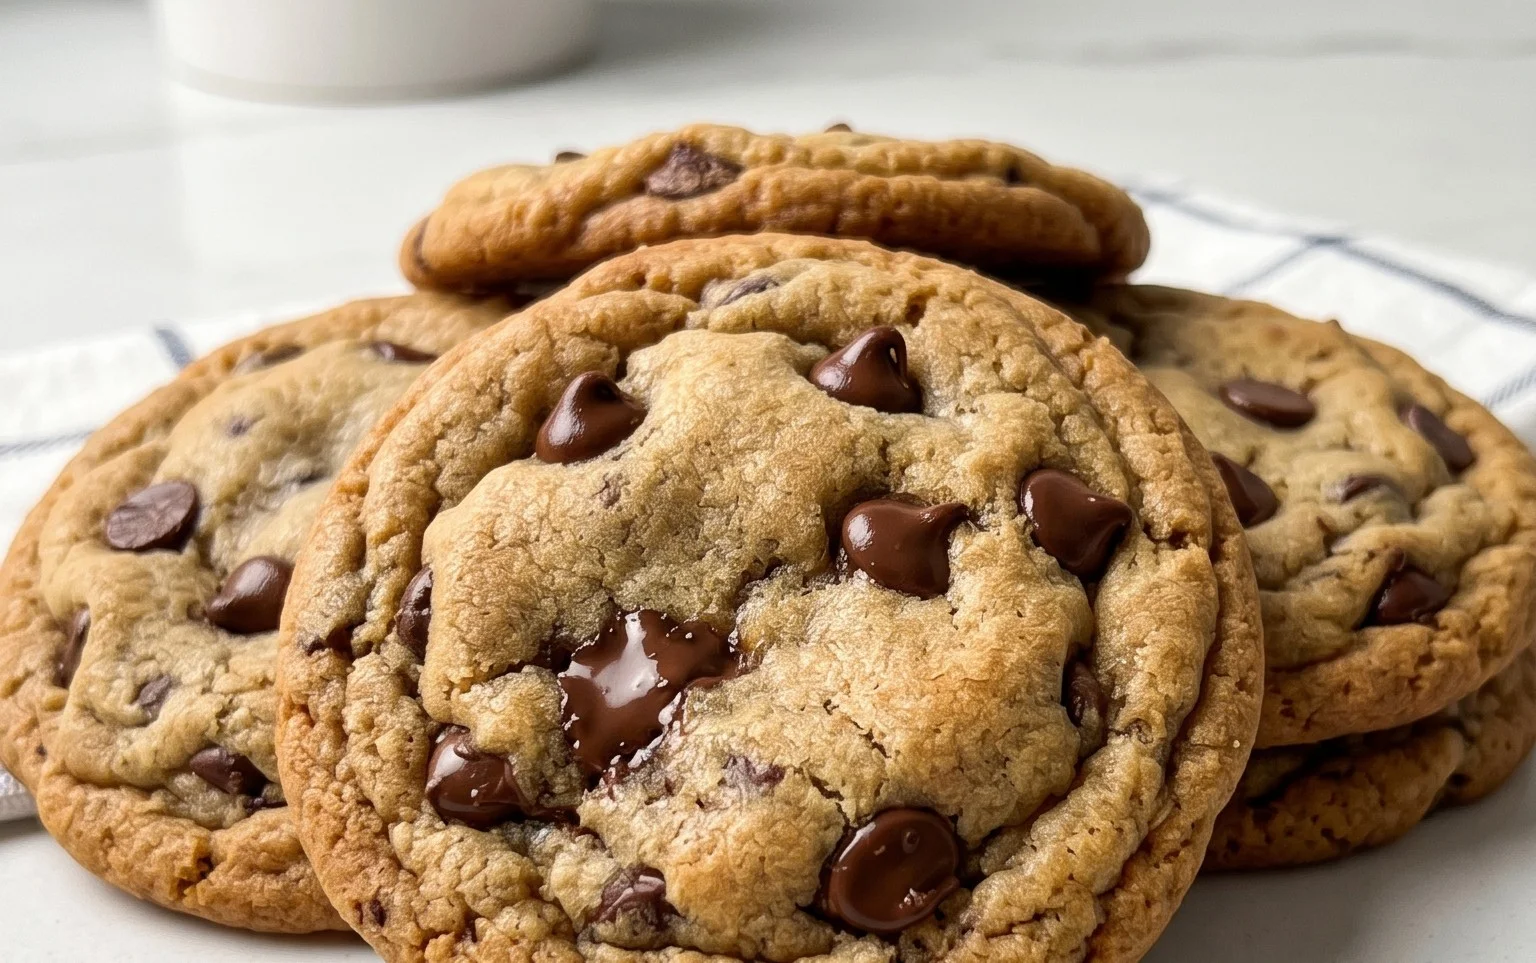
Crispy and chewy chocolate chip cookies are a universal language of comfort and joy. There’s something inherently magical about that perfect bite – the satisfying crunch from the edges that gives way to a delightfully soft, gooey center. These aren’t just cookies; they’re edible moments of bliss, transporting us back to childhood baking sessions or cozy evenings with loved ones. What truly sets these crispy and chewy chocolate chip cookies apart is that exquisite textural dance, a testament to careful balancing of ingredients and technique. They’re more than just a dessert; they’re a delicious affirmation, a sweet reward that never fails to bring a smile. Get ready to master the art of crafting these iconic treats!
Crispy and Chewy Chocolate Chip Cookies
There are few desserts as universally loved as the classic chocolate chip cookie. But achieving that perfect balance of crispy edges and a wonderfully chewy center can sometimes feel like a quest worthy of a knight. Fear not, fellow baking enthusiasts! Today, I’m sharing my go-to recipe for chocolate chip cookies that consistently deliver on both texture and flavor. This recipe is straightforward, rewarding, and results in cookies that are simply divine. Prepare to impress your friends, family, or just yourself with a batch of these irresistible treats.
Ingredients:
The Art of the Cookie: Step-by-Step Instructions
Creating these perfect cookies is a multi-stage process, and each step plays a crucial role in the final outcome. Let’s get baking!
1. The Dry Ingredients Foundation
Start by preheating your oven to 375°F (190°C). This is a critical temperature for achieving that signature crispy edge. Line baking sheets with parchment paper to prevent sticking and ensure even browning. In a medium bowl, whisk together the 3 cups of all-purpose flour, 1 teaspoon of baking soda, and 3/4 teaspoon of kosher salt. Whisking these dry ingredients together thoroughly ensures that the leavening agent (baking soda) and salt are evenly distributed throughout the dough, which is vital for consistent cookie rise and flavor. Set this bowl aside.
2. Creaming the Butter and Sugars
This is arguably the most important step for cookie texture. In a large bowl, using an electric mixer (stand mixer with a paddle attachment or a hand mixer), cream together the 2 sticks of softened unsalted butter with 1 cup of light brown sugar and 1 cup of granulated sugar. Creaming means beating the butter and sugars together until the mixture is light, fluffy, and pnon-alcoholic ale yellow in color. This process incorporates air into the dough, which helps the cookies to spread and creates a tender texture. Don’t rush this step; it can take anywhere from 3 to 5 minutes of beating. Scrape down the sides of the bowl periodically to ensure everything is incorporated.
3. Introducing the Wet Ingredients
Once the butter and sugar mixture is perfectly creamed, it’s time to add the eggs and vanilla. Add the 2 large eggs, one at a time, beating well after each addition until fully incorporated. The eggs act as a binder and contribute to the chegrape juicess of the cookie. After the eggs are in, stir in the 2 teaspoons of pure vanilla extract. Vanilla is more than just a scent; it enhances all the other flavors in the cookie and adds a depth of deliciousness. Mix until just combined; overmixing at this stage can lead to tougher cookies.
4. Combining Wet and Dry: The Dough Emerges
Now, it’s time to bring the two bowls together. Gradually add the dry ingredients to the wet ingredients, mixing on low speed until just combined. It’s important not to overmix here. You want to mix until you no longer see streaks of dry flour. Overmixing develops the gluten in the flour, which can result in tough, dense cookies. A few small lumps of flour are perfectly fine at this stage.
5. The Star of the Show: Chocolate Chips (and a Touch of Salt!)
Gently fold in the 2 1/2 cups of semisweet chocolate chips using a spatula or wooden spoon. Ensure the chocolate chips are evenly distributed throughout the dough. If you are using the optional flaked sea salt, you can either fold a pinch of it into the dough now, or save it for sprinkling on top of the cookies before baking. Once the chocolate chips are incorporated, your cookie dough is ready!
6. Scooping and Baking for Perfection
Drop rounded tablespoons of dough onto the prepared baking sheets, leaving about 2 inches between each cookie to allow for spreading. For that truly professional look and even baking, I highly recommend using a cookie scoop. If you want a slightly flatter, crispier cookie, you can gently press down on the tops of the dough balls with your palm or the bottom of a glass. If you are using flaked sea salt and didn’t mix it into the dough, sprinkle a tiny pinch over the top of each cookie now. This little touch of salt is truly transformative, enhancing the sweetness of the chocolate and cutting through the richness.
Bake for 9 to 12 minutes, or until the edges are golden brown and set, and the centers still look slightly soft and underdone. This is the key to achieving that chewy interior! The cookies will continue to cook and firm up on the baking sheet after you remove them from the oven. For an extra crispy cookie, you can bake them for an extra minute or two, but be careful not to burn them.
Let the cookies cool on the baking sheets for 5 to 10 minutes before transferring them to a wire rack to cool completely. This allows them to set properly and prevents them from breaking. Enjoy your wonderfully crispy and chewy chocolate chip cookies! They are best enjoyed warm with a glass of milk, but they also store beautifully in an airtight container at room temperature for several days. Happy baking!

Conclusion:
And there you have it – the recipe for truly exceptional crispy and chewy chocolate chip cookies! We’ve unlocked the secrets to achieving that perfect balance of a satisfyingly crisp edge and a delightfully soft, chewy center, all while delivering an explosion of rich chocolate flavor. This recipe is a guaranteed crowd-pleaser, perfect for baking a batch for family movie nights, impromptu gatherings, or simply as a well-deserved treat for yourself. Don’t be afraid to get creative with your additions; think chopped nuts for added crunch, a sprinkle of sea salt on top for a sophisticated twist, or even a swirl of caramel before baking. The possibilities are as endless as the deliciousness these cookies bring. So, gather your ingredients, preheat your oven, and embark on this delightful baking adventure. I encourage you to try this recipe and experience the magic of homemade, perfectly textured chocolate chip cookies!
Frequently Asked Questions:
Why are my cookies spreading too much?
This can happen for a few reasons. Ensure your butter is softened, not melted. Over-mixing the dough after adding flour can also contribute to excessive spreading. Another common culprit is using too much brown sugar relative to the flour, which adds moisture and promotes spread. Measuring your flour accurately by spooning it into the cup and leveling it off, rather than scooping directly from the bag, is also crucial.
Can I make these cookies ahead of time?
Absolutely! You can prepare the cookie dough, form it into balls, and refrigerate it for up to 3 days, or freeze it for up to 3 months. When you’re ready to bake, you can bake directly from frozen, adding a minute or two to the baking time. This is a fantastic way to have fresh, warm cookies on demand!
How can I make my cookies even chewier?
To enhance chegrape juicess, ensure you’re using a higher ratio of brown sugar to granulated sugar. Don’t overbake them; slightly underbaked cookies will continue to set as they cool, resulting in a chewier texture. Allowing the dough to rest in the refrigerator for at least 30 minutes (or longer) can also help develop flavor and improve chegrape juicess.
Crispy and Chewy Chocolate Chip Cookies
Achieve the perfect balance of crispy edges and chewy centers with these classic chocolate chip cookies. A simple recipe for an irresistible treat.
Ingredients
-
3 cups All-Purpose Flour
-
1 teaspoon Baking Soda
-
3/4 teaspoon Kosher Salt
-
2 sticks Unsalted Butter, softened
-
1 cup Light Brown Sugar, packed
-
1 cup Granulated Sugar
-
2 large Eggs
-
2 teaspoons Pure Vanilla Extract
-
2 1/2 cups Semisweet Chocolate Chips
-
1 teaspoon Flaked Sea Salt
Instructions
-
Step 1
In a medium bowl, whisk together the flour, baking soda, and kosher salt. Set aside. -
Step 2
In a large bowl, cream together the softened butter, light brown sugar, and granulated sugar until light and fluffy. -
Step 3
Beat in the eggs one at a time, then stir in the vanilla extract. -
Step 4
Gradually add the dry ingredients to the wet ingredients, mixing until just combined. Do not overmix. -
Step 5
Stir in the semisweet chocolate chips. -
Step 6
Drop rounded tablespoons of dough onto ungreased baking sheets, spacing them about 2 inches apart. -
Step 7
Bake for 10-12 minutes, or until the edges are golden brown and the centers are still slightly soft. -
Step 8
Remove from oven and sprinkle with flaked sea salt, if desired, immediately after baking. Let cool on the baking sheets for a few minutes before transferring to a wire rack to cool completely.
Important Information
Nutrition Facts (Per Serving)
It is important to consider this information as approximate and not to use it as definitive health advice.
Allergy Information
Please check ingredients for potential allergens and consult a health professional if in doubt.