Easy Apple Pie Bars – Delicious Dessert Bars
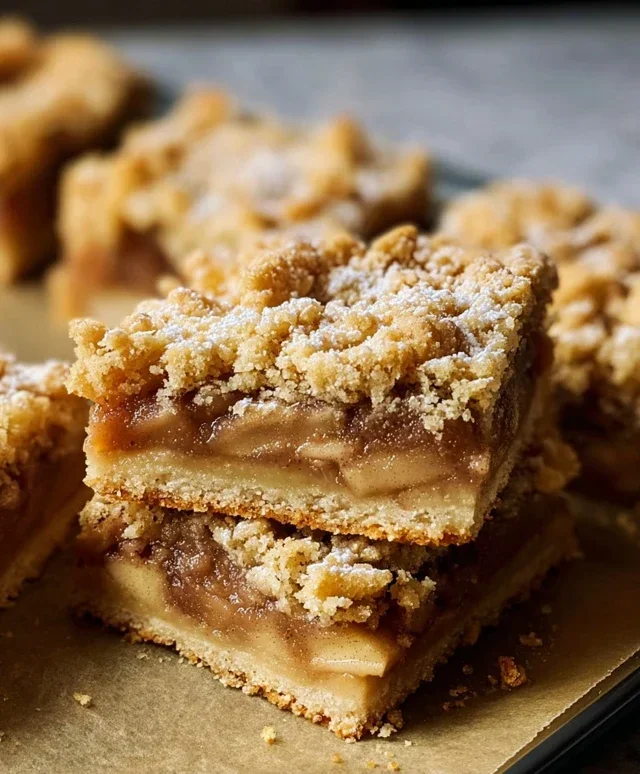
Apple pie bars are a culinary dream come true, a delightful twist on a beloved classic that brings all the comforting flavors of a traditional apple pie into a perfectly portioned, easy-to-eat format. Who doesn’t adore the sweet, tender apples, kissed with cinnamon and baked into a golden, buttery crust? We certainly do! That irresistible combination of warm spice, flaky pastry, and sweet fruit is pure comfort in every bite. What truly makes these apple pie bars so special is their sheer convenience. No more wrestling with a pie plate or worrying about a soggy bottom. These bars are perfect for picnics, potlucks, or simply an afternoon treat. They capture the essence of grandma’s homemade pie but in a way that’s accessible to everyone, anytime. Get ready to fall in love with these simple, yet spectacular, apple pie bars!
Apple Pie Bars
There’s something undeniably comforting about apple pie. The flaky crust, the warm, spiced apple filling – it’s a classic for a reason. But sometimes, the thought of rolling out pie dough can feel a bit… daunting. Enter apple pie bars! These delightful treats capture all the beloved flavors of traditional apple pie, but in a far more approachable, portable, and dare I say, even more delicious format. They’re perfect for picnics, potlucks, or simply enjoying with a cup of coffee on a cozy afternoon. The beauty of bars is their versatility; they slice beautifully and are easy to share. We’ve taken all the best elements of a classic apple pie and transformed them into a wonderfully simple bar. The base is a tender, buttery shortbread-like crust that’s incredibly easy to press into the pan, and the topping is a generously spiced apple mixture that bakes up into a luscious, slightly jammy filling. Forget the fuss of crimping edges or worrying about a soggy bottom; these bars are designed for maximum flavor with minimal stress.
Ingredients:
Instructions:
Making the Crust:
The foundation of these delicious apple pie bars is a simple yet incredibly satisfying crust. In a large mixing bowl, we’ll start by combining the dry ingredients for the crust. Whisk together the 2½ cups of all-purpose flour, 1 cup of granulated sugar, 1 teaspoon of baking powder, and ½ teaspoon of salt. This ensures everything is evenly distributed, which is key for a consistent texture. Now, for the butter. It’s crucial that your 1 cup (2 sticks) of unsalted butter is very cold and cut into small cubes. This is because we’re essentially making a sort of shortbread base, and cold butter is what creates those delightful flaky layers. Add the cold, cubed butter to the flour mixture. Using a pastry blender, a fork, or even your fingertips (if you work quickly to avoid warming the butter too much), cut the butter into the dry ingredients until the mixture resembles coarse crum extractbs with some pea-sized pieces of butter still visible. Don’t overmix it at this stage; those little butter pockets are a good thing.
Next, we’ll add the wet ingredients to bind the crust together. In a separate small bowl, whisk together 1 egg and 1 teaspoon of vanilla extract. Pour this wet mixture over the flour and butter crum extractbs. Gently mix everything together until a soft, cohesive dough forms. It will be a bit crum extractbly, but it should hold together when squeezed. Take about two-thirds of this dough and firmly press it into the bottom of a 9×13 inch baking pan. You want an even layer across the entire pan. You can use the bottom of a measuring cup or a flat-bottomed glass to help you get a nice, compact base. Reserve the remaining one-third of the dough; we’ll use this for a crum extractb topping.
Preparing the Apple Filling:
While our crust is getting prepped, let’s move on to the star of the show – the apples! In a medium bowl, combine your 4 cups of peeled and diced apples. Make sure the apples are cut into roughly uniform, bite-sized pieces for even cooking. Toss them with 2 tablespoons of lemon juice. The lemon juice not only adds a subtle brightness that cuts through the sweetness but also helps prevent the apples from browning while you’re working.
Now, for that irresistible spiced flavor. To the apples and lemon juice, add ½ cup of brown sugar, 2 teaspoons of cinnamon, and 1 teaspoon of cornstarch. The brown sugar adds a lovely caramel-like depth, while the cinnamon provides that warm, comforting aroma and taste we all love in apple pie. The cornstarch is our secret weapon for thickening the filling, ensuring it’s not too watery after baking. Stir everything together gently until the apples are evenly coated with the sugar, spices, and cornstarch mixture.
Assembling and Baking the Bars:
With your crust pressed into the pan and your apple filling ready to go, it’s time to bring it all together. Evenly spread the prepared apple mixture over the crust in the baking pan. Make sure to get an even layer so every bite has plenty of delicious apple goodness. Now, take that reserved one-third of the dough for the topping. You can do one of two things with it: you can either crum extractble it over the top of the apples for a rustic, streusel-like topping, or you can take small pieces and gently press them onto the apples to create a more structured, pie-crust-like topping. Both methods are delicious! For a bit more crunch and visual appeal, I like to crum extractble it over, leaving some small gaps so the bubbling apple filling can peek through.
Preheat your oven to 375 degrees Fahrenheit (190 degrees Celsius). Bake the apple pie bars for 35-45 minutes, or until the crust is golden brown and the apple filling is bubbly and slightly thickened. The exact baking time will depend on your oven, so keep an eye on them. If the crust is browning too quickly before the filling is set, you can loosely tent the pan with aluminum foil.
Cooling and Slicing:
This is perhaps the most challengin extractg part: waiting! Once the bars are out of the oven, resist the urge to slice into them immediately. It’s absolutely crucial to let them cool completely in the pan on a wire rack. This allows the filling to set properly. If you try to cut them while they’re still hot, you’ll end up with a gooey mess, and while delicious, it won’t be the neat bar you’re aiming for. I usually let them cool for at least 2-3 hours, or even better, chill them in the refrigerator for an hour or two after they’ve cooled to room temperature. Once completely cooled, use a sharp knife to cut them into your desired bar sizes. I usually cut mine into 12 or 16 bars. Enjoy these delightful apple pie bars on their own, or with a scoop of vanilla ice cream for an extra special treat!
Conclusion:
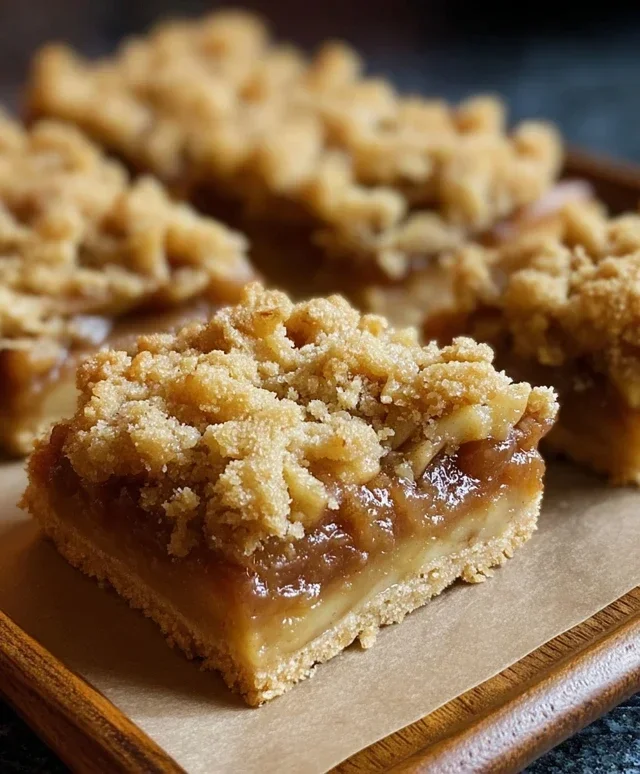
And there you have it – a foolproof recipe for delicious Apple Pie Bars! These bars are a fantastic way to enjoy all the comforting flavors of classic apple pie without the fuss of rolling out pastry. The buttery, crum extractbly base and topping perfectly complement the sweet and slightly tart apple filling, creating a dessert that’s both satisfying and incredibly easy to make. They are perfect for potlucks, holiday gatherings, or simply as an afternoon treat. I’m confident you’ll love how simple they are to assemble and how impressive they look when served.
For serving, I highly recommend a generous dollop of vanilla ice cream or a drizzle of caramel sauce. They’re also wonderful on their own, perhaps with a dusting of powdered sugar. Don’t be afraid to get creative with variations! You could add a sprinkle of cinnamon or nutmeg to the streusel topping, incorporate chopped pecans or walnuts for extra crunch, or even swap out the apples for pears or mixed berries.
I truly hope you give these Apple Pie Bars a try. They are a guaranteed crowd-pleaser and a wonderful addition to any baker’s repertoire. Let me know how they turn out for you!
Frequently Asked Questions:
Can I make these Apple Pie Bars ahead of time?
Absolutely! These bars store beautifully in an airtight container at room temperature for up to 3 days, or in the refrigerator for up to a week. They are actually even better on the second day as the flavors meld together.
What kind of apples should I use for the best flavor?
A mix of apples provides the best flavor and texture. I suggest using a combination of sweet apples like Fuji or Gala for sweetness and tart apples like Granny Smith for a nice bite. This balance ensures your filling isn’t too mushy or too overwhelmingly sour.
Can I freeze Apple Pie Bars?
Yes, you can! Once cooled completely, wrap individual bars or the entire pan tightly in plastic wrap and then aluminum foil. They can be frozen for up to 2-3 months. Thaw them overnight in the refrigerator before enjoying.
Apple Pie Bars
Delectable apple pie bars with a buttery crust and a sweet, spiced apple filling, perfect for any occasion.
Ingredients
-
2½ cups all-purpose flour
-
1 cup granulated sugar
-
1 tsp baking powder
-
½ tsp salt
-
1 cup (2 sticks) cold unsalted butter, cubed
-
1 egg
-
1 tsp vanilla extract
-
4 cups peeled & diced apples
-
2 tbsp lemon juice
-
½ cup brown sugar
-
2 tsp cinnamon
-
1 tsp cornstarch
Instructions
-
Step 1
Preheat oven to 375°F (190°C). Grease and flour a 9×13 inch baking pan. -
Step 2
In a large bowl, whisk together the flour, granulated sugar, baking powder, and salt. Cut in the cold butter until the mixture resembles coarse crumbs. -
Step 3
In a small bowl, whisk together the egg and vanilla extract. Add to the flour mixture and mix until a dough forms. Press two-thirds of the dough into the prepared pan to form the crust. -
Step 4
In a medium bowl, combine the diced apples, lemon juice, brown sugar, cinnamon, and cornstarch. Toss to coat the apples evenly. -
Step 5
Spread the apple mixture evenly over the crust. Crumble the remaining one-third of the dough over the apple filling. -
Step 6
Bake for 30-35 minutes, or until the topping is golden brown and the filling is bubbly. -
Step 7
Let cool completely before cutting into bars.
Important Information
Nutrition Facts (Per Serving)
It is important to consider this information as approximate and not to use it as definitive health advice.
Allergy Information
Please check ingredients for potential allergens and consult a health professional if in doubt.