Mini Chicken Pot Pies- Delicious Comfort Food
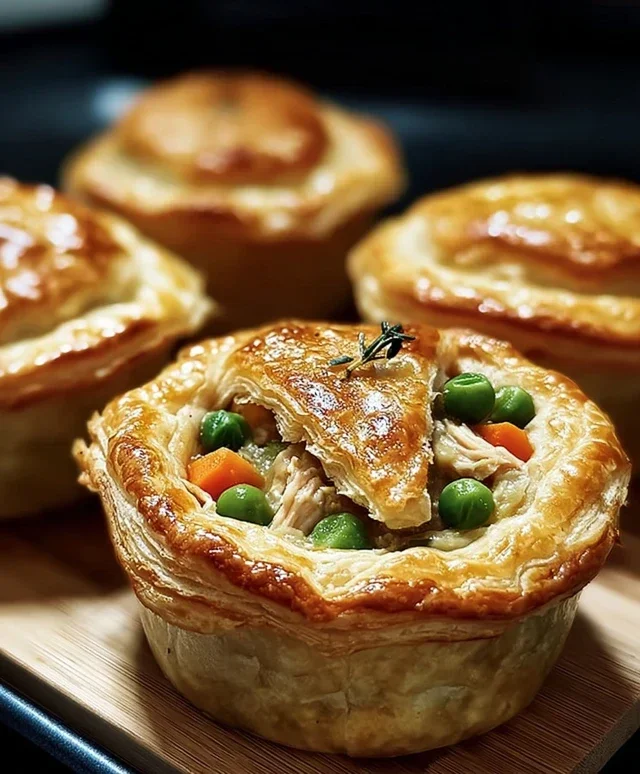
Mini Chicken Pot Pies are the ultimate comfort food, miniaturized into perfect, individual portions that are as delightful to behold as they are to devour. There’s something inherently heartwarming about a classic chicken pot pie – that creamy, savory filling, bursting with tender chicken and vegetables, all nestled beneath a golden, flaky crust. But these mini versions elevate the experience, offering a personal serving of pure culinary bliss. We love them because they’re incredibly satisfying, evoking childhood memories and cozy evenings. What makes these mini chicken pot pies truly special is their versatility; they’re perfect for elegant dinner parties, fun family meals, or even as a delightful make-ahead lunch. Get ready to create your own batch of these irresistible little treasures!
Discover the Charm of Mini Chicken Pot Pies
Your new favorite comfort food awaits!
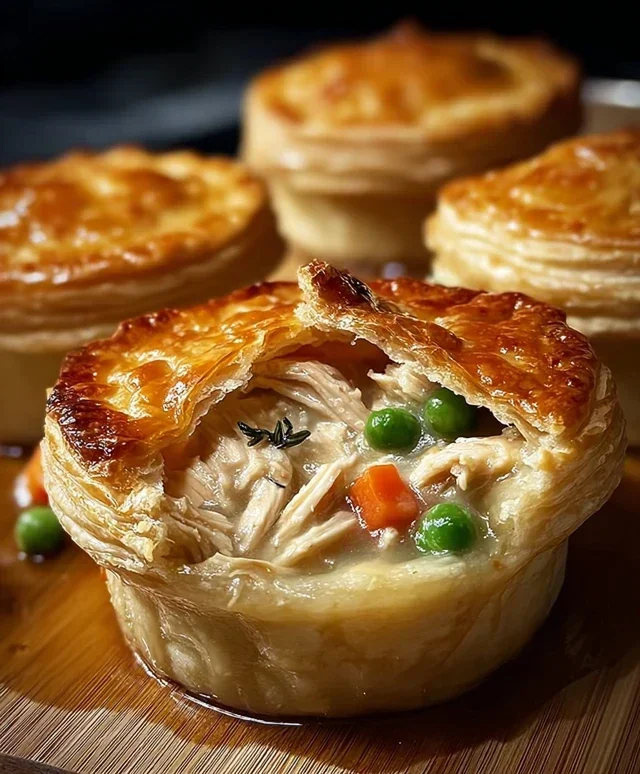
Mini Chicken Pot Pies
There’s something incredibly comforting about a chicken pot pie. The creamy, savory filling encased in a flaky crust is pure culinary bliss. But let’s be honest, sometimes a whole pie feels like too much, or you’re just looking for a fun, individual portion. That’s where these mini chicken pot pies come in! Using simple, readily available ingredients, you can whip up these adorable and delicious treats in no time. They’re perfect for weeknight dinners, party appetizers, or even a fun lunch. The best part? They are surprisingly easy to make, especially with a little help from a few kitchen shortcuts.
Ingredients:
Cooking Instructions:
Let’s get started on these delightful mini pot pies! The beauty of this recipe lies in its simplicity, making it accessible for cooks of all skill levels. We’ll be creating individual servings that are both charming and incredibly satisfying.
Preparing the Filling
1. Cook the Chicken: Begin extract by dicing your boneless chicken breast into small, bite-sized pieces. You want them to be uniform in size so they cook evenly and are easy to eat within the mini pies. In a skillet, heat a little bit of cooking spray over medium-high heat. Add the diced chicken and cook, stirring occasionally, until it’s no longer pink and is cooked through. This should take about 5-7 minutes. Once cooked, remove the chicken from the skillet and set it aside in a medium bowl.
2. Combine the Filling Ingredients: To the bowl with the cooked chicken, add the frozen peas and carrots. These don’t need to be thawed beforehand; they’ll cook perfectly within the pie. Next, pour in the entire can of cream of chicken soup. This forms the rich, creamy base of our pot pie filling. Now, it’s time for the seasonings. Add the garlic powder, onion powder, and salt. Stir everything together gently but thoroughly until all the ingredients are well combined and evenly distributed. You want to make sure the chicken and vegetables are coated in the creamy soup mixture.
Assembling the Mini Pies
3. Prepare the Biscuit Cups: Take your two cans of refrigerated biscuits. Open them up and carefully separate the biscuits. You should have 16 biscuits in total. Lightly grease a muffin tin with cooking spray. This is crucial to prevent the biscuits from sticking and ensures easy removal of your finished pot pies. Take each biscuit and gently press it into the bottom and up the sides of each muffin cup, creating a little well for the filling. You might need to stretch or gently flatten the biscuit slightly to help it conform to the muffin tin shape. Aim for an even layer of biscuit dough around the bottom and sides.
4. Fill the Biscuit Cups: Now, spoon the prepared chicken and vegetable filling into each of the biscuit-lined muffin cups. Don’t overfill them, as you want to leave a little room for the biscuit to potentially puff up and to prevent the filling from overflowing during baking. A good starting point is to fill each cup about two-thirds to three-quarters full. Ensure you distribute the chicken and vegetables relatively evenly among the 16 cups.
Baking the Pot Pies
5. Bake to Golden Perfection: Preheat your oven to 375°F (190°C). Once your muffin tin is filled, place it in the preheated oven. Bake for approximately 18-22 minutes, or until the biscuit crust is golden brown and puffed up, and the filling is hot and bubbly. You’ll want to keep an eye on them during the last few minutes of baking to ensure they don’t get too dark. If the tops are browning too quickly but the centers aren’t quite done, you can loosely tent the muffin tin with aluminum foil. Once they’re beautifully golden and the filling is bubbling around the edges, carefully remove the muffin tin from the oven.
Allow the mini chicken pot pies to cool in the muffin tin for about 5-10 minutes. This will help them set up slightly, making them easier to remove. You can then carefully use a butter knife or a small spatula to loosen the edges and lift them out. Serve warm and enjoy the delightful taste of homemade comfort food in a perfectly portioned package! These are wonderful on their own or served with a simple side salad.
Conclusion:
I hope you’re as excited about these mini chicken pot pies as I am! They’re a truly fantastic way to enjoy all the comforting flavors of classic chicken pot pie in a perfectly portioned, incredibly adorable package. The flaky, buttery crust combined with the savory, creamy chicken and vegetable filling makes for an unforgettable meal that’s surprisingly easy to whip up. These are ideal for weeknight dinners, a delightful appetizer for gatherings, or even a fun and satisfying lunch. Feel free to get creative with your fillings – think about adding a sprinkle of fresh herbs like thyme or rosemary, or perhaps a touch of nutmeg to the sauce for an extra layer of warmth.
Serve these delightful mini chicken pot pies piping hot, perhaps alongside a crisp green salad or some roasted root vegetables. They’re also wonderful on their own as a complete and satisfying treat. Don’t be afraid to experiment with different pastry options too, like puff pastry for an even lighter, airier crust!
Frequently Asked Questions:
Can I make these mini chicken pot pies ahead of time?
Yes, absolutely! You can prepare the filling and assemble the pies up to a day in advance. Store them covered in the refrigerator. When you’re ready to bake, you might need to add a few extra minutes to the baking time to ensure they are heated through. You can also freeze the unbaked or baked mini chicken pot pies for up to a month. If baking from frozen, allow for a longer baking time.
What are some good vegetarian or vegan variations?
For a delicious vegetarian option, replace the chicken with a hearty mix of mushrooms, leeks, and roasted root vegetables like carrots and parsnips. For a vegan version, use a plant-based butter for the crust and a plant-based milk and thickening agent (like cornstarch) for the creamy filling. Nutritional yeast can add a wonderful cheesy flavor. This recipe is incredibly adaptable!
Mini Chicken Pot Pies
Individual servings of classic chicken pot pie, made easy with refrigerated biscuits.
Ingredients
-
2 cans refrigerated biscuits (8-count each)
-
½ lb boneless chicken breast, diced
-
1 cup frozen peas & carrots
-
1 can (10.5 oz) cream of chicken soup
-
½ tsp garlic powder
-
½ tsp onion powder
-
¼ tsp salt
-
Cooking spray
Instructions
-
Step 1
Preheat oven to 375°F (190°C). Lightly spray an 8-cup muffin tin with cooking spray. -
Step 2
In a medium bowl, combine the diced chicken, frozen peas and carrots, cream of chicken soup, garlic powder, onion powder, and salt. Stir until well mixed. -
Step 3
Separate the refrigerated biscuits. Press each biscuit into the bottom and up the sides of the muffin tin cups to form a crust. -
Step 4
Spoon the chicken mixture evenly into the biscuit-lined muffin cups. -
Step 5
Bake for 20-25 minutes, or until the biscuit crust is golden brown and the filling is bubbly. -
Step 6
Let cool slightly before carefully removing from the muffin tin. Serve warm.
Important Information
Nutrition Facts (Per Serving)
It is important to consider this information as approximate and not to use it as definitive health advice.
Allergy Information
Please check ingredients for potential allergens and consult a health professional if in doubt.