Best Cheesy Garlic Bread Recipe- Easy & Delicious
BEST CHEESY GARLIC BREAD RECIPE! Prepare yourselves, because today we’re diving headfirst into a world of pure, unadulterated comfort food. If there’s one side dish that can instantly elevate any meal from ordinary to extraordinary, it’s undeniably cheesy garlic bread. We all have those memories, right? The warm, inviting aroma wafting from the oven, the promise of crispy crust giving way to soft, pillowy bread, and that glorious, melty cheese pull that makes your heart sing. It’s more than just bread; it’s a culinary hug. What makes this particular BEST CHEESY GARLIC BREAD RECIPE truly special? It’s the perfect balance of pungent garlic, creamy butter, and a generous, bubbling blanket of the finest cheese, all baked to golden perfection. Get ready to master the art of this beloved classic, and trust me, your taste buds will thank you for it.
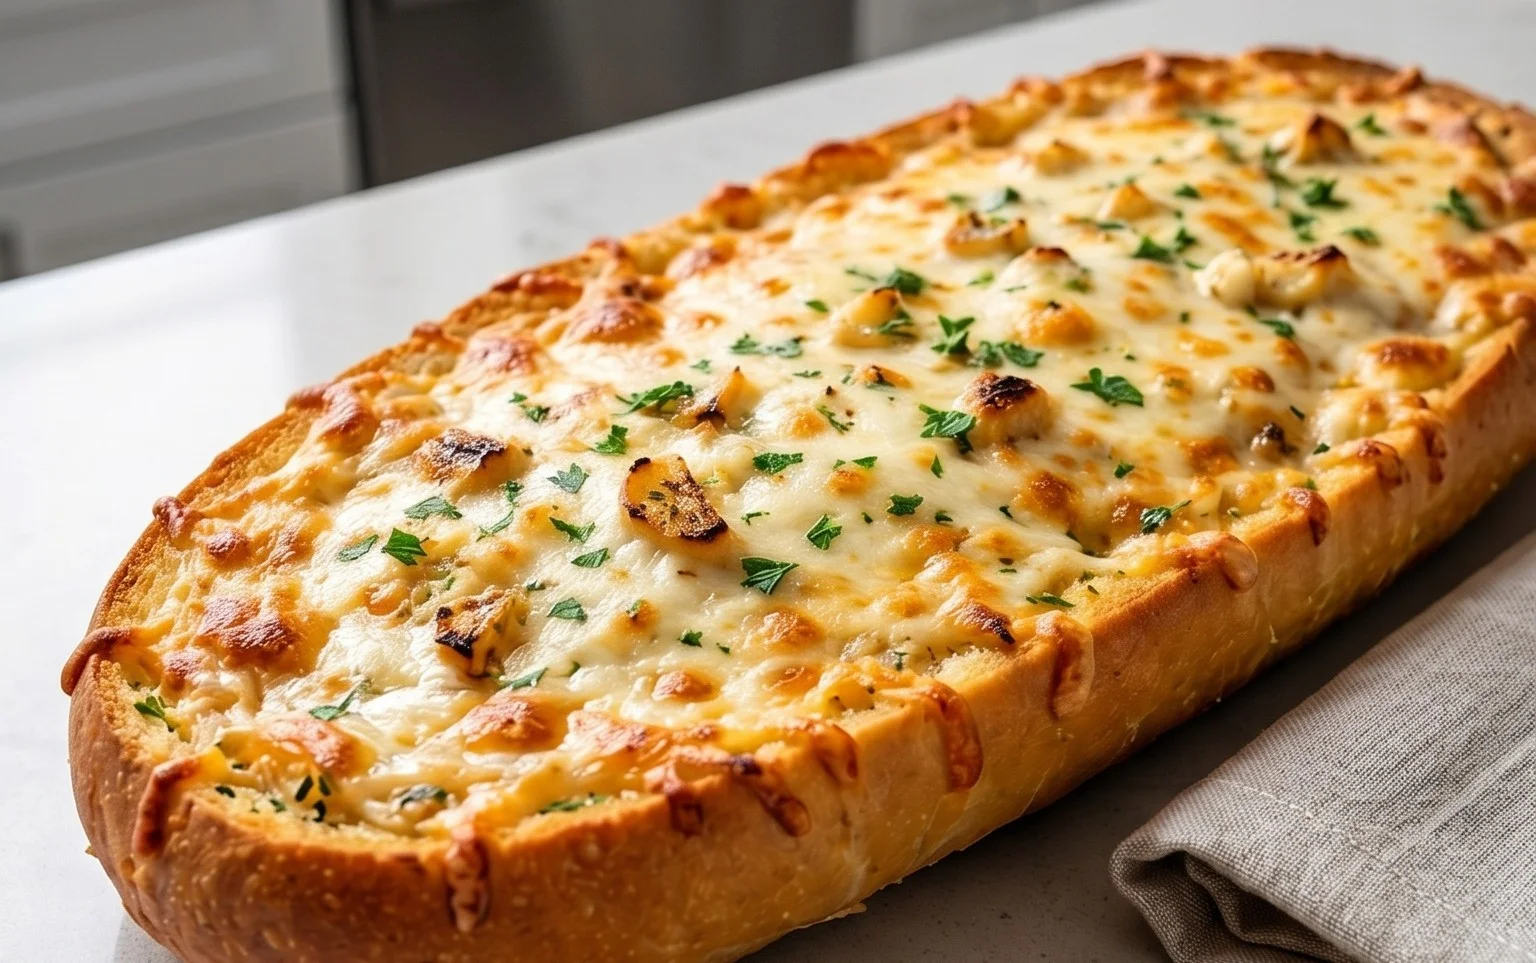
BEST CHEESY GARLIC BREAD RECIPE
There are few things in life as comforting and universally loved as a warm, gooey, cheesy garlic bread. Forget those dry, bland versions you sometimes encounter; we’re talking about the kind that makes you close your eyes with every bite, the kind that elevates any meal from ordinary to extraordinary. This recipe is my absolute go-to for achieving that perfect balance of crispy crust, soft interior, and an explosion of garlic and cheese flavor. It’s surprisingly simple to make, and the results are consistently spectacular. Prepare to have your kitchen smell divine!
Ingredients:
Getting Started: The Garlic Foundation
The heart and soul of any great garlic bread is, of course, the garlic. For this recipe, I like to start by creating a deeply flavorful garlic paste. If you have some pre-roasted garlic on hand from a previous cooking adventure, that’s fantastic! Roasted garlic adds a beautiful sweetness and mellows out the pungent bite of raw garlic, making it incredibly spreadable and delicious. If you don’t have roasted garlic, don’t worry. We’ll make a simple, quick garlic oil that will still deliver incredible flavor.
To prepare the garlic paste, finely mince your 8-10 garlic cloves. I find using a garlic press is the quickest and easiest way to get a very fine texture, but you can also mince them with a sharp knife. Place the minced garlic in a small bowl. Add the 2 tablespoons of olive oil and a pinch of salt. Stir everything together. If you are using roasted garlic, mash 2-3 cloves of the roasted garlic into a paste and add it to the bowl with the olive oil and minced raw garlic. The olive oil will help to loosen up the roasted garlic and make it easier to incorporate. Let this mixture sit for at least 10 minutes while you prepare the other components. This allows the flavors to meld beautifully.
Crafting the Luscious Garlic Butter Mixture
This is where the magic truly begin extracts to happen. We’re going to create a rich, savory spread that coats every nook and cranny of our bread. In a medium bowl, combine the ½ cup of melted butter. To this, we’ll add the rest of our flavor boosters. Crack in 1 egg – this helps to bind the butter mixture and adds a lovely richness. Then, pour in ¼ cup of milk, which will contribute to the creamy texture.
Now for the seasonings: add ½ teaspoon of salt and ½ teaspoon of paprika. The paprika isn’t just for color; it adds a subtle warmth and complexity. Finally, stir in 2 tablespoons of chopped fresh parsley. This adds a burst of freshness and a beautiful visual appeal. Whisk everything together vigorously until it’s well combined and has a smooth, emulsified texture. Don’t be shy with the whisking; you want all these ingredients to become one cohesive, delicious sauce.
Preparing the Bread Base
For this recipe, I’m absolutely obsessed with using King’s Hawaiian Origin extractal Sweet Rolls kept in their full sheet form. The slightly sweet, incredibly soft texture of these rolls is a game-changer for garlic bread. They soak up the garlic butter beautifully and caramelize wonderfully in the oven, creating these irresistible pockets of chewy, garlicky goodness.
If you can’t find the King’s Hawaiian rolls in this format, don’t fret! A good quality French baguette, sliced lengthwise, will also work beautifully. You’ll want to make sure your bread is fresh, but not so fresh that it’s overly soft and might become mushy. A day-old baguette is often perfect. If you’re using the sheet rolls, you’ll want to gently separate the rolls while keeping them attached in their rectangular form. If you’re using a baguette, slice it in half lengthwise.
Assembling the Masterpiece
Now for the most satisfying part: assembling our cheesy garlic bread! Take your prepared bread (either the King’s Hawaiian sheet or the baguette halves) and place it on a large baking sheet lined with parchment paper. This will make for easy cleanup later.
Carefully spoon or brush the garlic-olive oil mixture over the cut surfaces of the bread. Make sure to get it into all the crevices between the rolls or the slices of the baguette. Don’t be afraid to be generous here – this is where all that amazing garlic flavor is going to penetrate the bread.
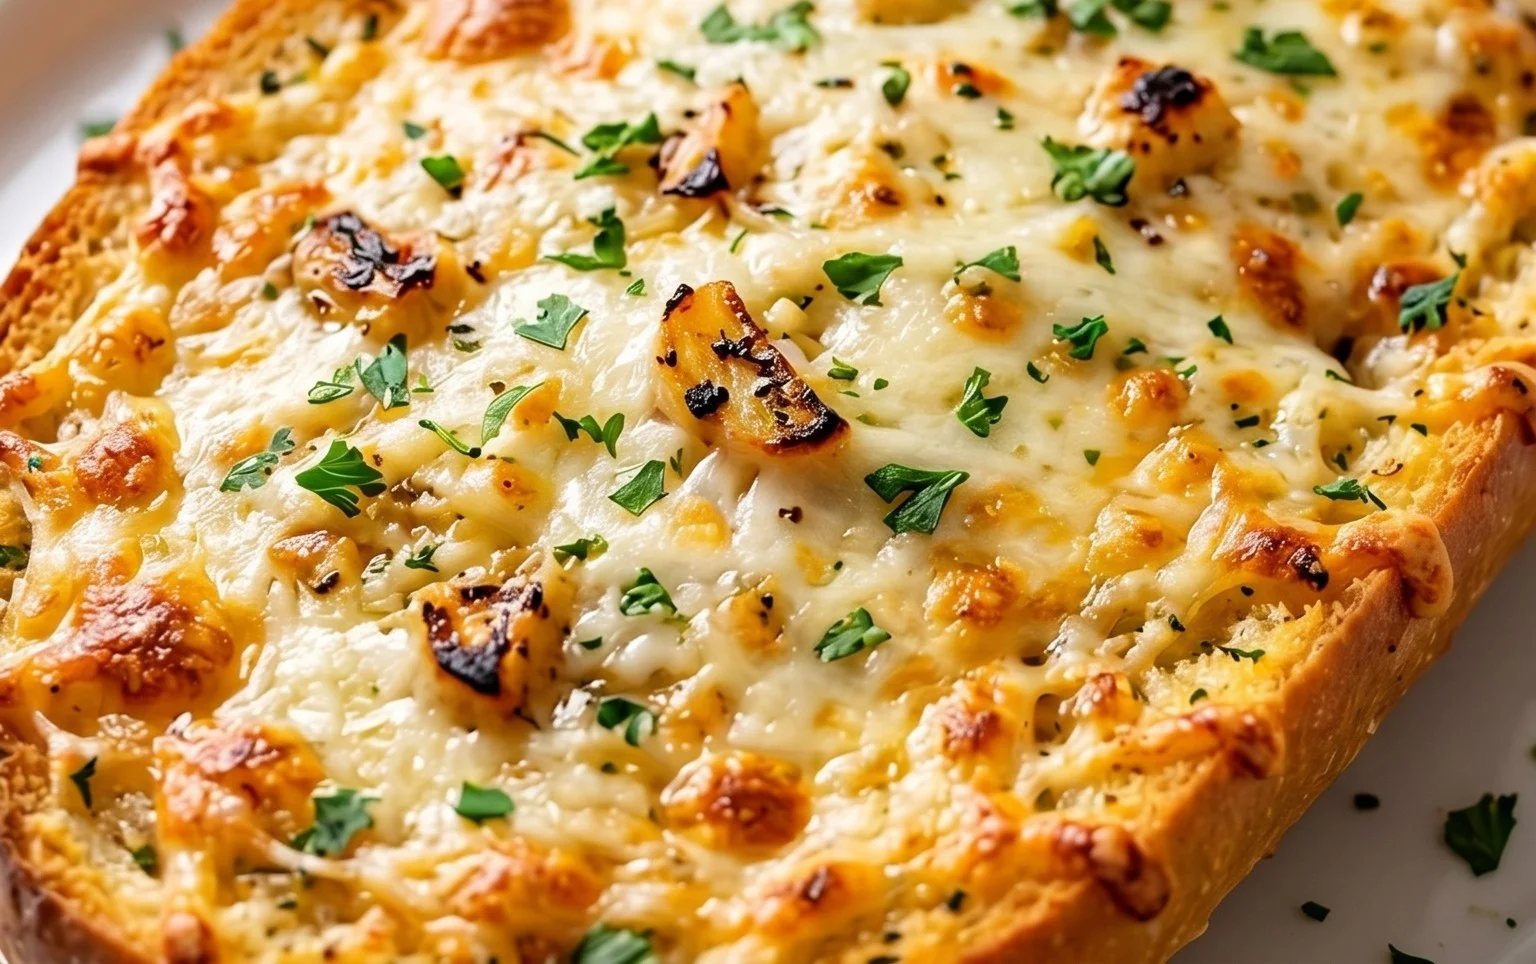
Next, evenly spread the luscious garlic butter mixture over the garlic oil layer. Again, ensure good coverage. You want every bite to be coated in this decadent blend. Once the butter mixture is spread, it’s time for the star of the show: the cheese! Sprinkle the 2 cups of shredded mozzarella cheese evenly over the top of the buttered bread. You want a good, thick layer of cheese that will melt and bubble into glorious strings.
Baking to Golden Perfection
Preheat your oven to 375°F (190°C). This moderate temperature allows the bread to toast up nicely without burning, and gives the cheese ample time to melt and get wonderfully golden and bubbly.
Place the baking sheet with your assembled garlic bread into the preheated oven. Bake for approximately 15-20 minutes, or until the edges of the bread are golden brown and crispy, and the cheese is melted, bubbly, and starting to brown in spots. Keep an eye on it, as oven temperatures can vary. The aroma filling your kitchen will be your best indicator that it’s almost ready!
Once it’s out of the oven, let it cool for just a minute or two on the baking sheet – this is crucial for the cheese to set slightly and prevent it from sliding off when you cut it. Then, if you used the sheet rolls, you can cut them into individual portions. If you used a baguette, slice it into your desired serving sizes.
For an extra touch of flair and flavor, sprinkle with more chopped fresh parsley and a pinch of chili flakes, if you like a little heat. Serve immediately and watch it disappear! This cheesy garlic bread is perfect as a side dish for pasta, soup, or salad, or honestly, it’s so good it can be a meal all on its own. Enjoy!
Conclusion:
I truly believe this is the BEST CHEESY GARLIC BREAD RECIPE you’ll ever try! It’s incredibly simple to whip up, delivering that perfect balance of buttery, garlicky goodness with a generous, bubbly cheese topping that’s simply irresistible. Whether you’re looking for a show-stopping appetizer or a comforting side dish, this recipe delivers every single time. It’s the ultimate crowd-pleaser, guaranteed to disappear in minutes!
This versatile bread pairs wonderfully with so many dishes. It’s a classic companion for pasta nights, a fantastic accompaniment to hearty soups and stews, and an absolute must-have alongside your favorite pizza. Feeling adventurous? Consider adding a sprinkle of red pepper flakes for a touch of heat, or try a blend of different cheeses like mozzarella, cheddar, and Monterey Jack for even more flavor complexity. Don’t be afraid to experiment! I wholeheartedly encourage you to give this recipe a try; you won’t regret it!
Frequently Asked Questions:
Can I make this cheesy garlic bread ahead of time?
Yes, you can prepare the garlic butter mixture and spread it on the bread. Wrap it tightly and refrigerate. When you’re ready to bake, add the cheese and bake as directed, adding a few extra minutes if needed to ensure it’s heated through.
What kind of bread is best for this recipe?
A crusty baguette or Italian loaf works beautifully as it holds up well to the butter and cheese. However, a good quality sourdough or even a simple French bread will also yield delicious results. The key is a bread that has a good crust and a soft interior.
My cheese isn’t melting evenly, what should I do?
Ensure your oven temperature is accurate and the bread is placed in the center rack for even heat distribution. If your cheese is browning too quickly before it melts, you can loosely tent the bread with aluminum foil for the last few minutes of baking.
BEST CHEESY GARLIC BREAD RECIPE
The ultimate cheesy garlic bread recipe with a hint of roasted garlic and fresh parsley.
Ingredients
-
8-10 garlic cloves
-
2 tbsp olive oil
-
Pinch of salt
-
Roasted garlic from above
-
½ cup butter, melted (113g)
-
1 egg
-
¼ cup milk (60g)
-
½ tsp salt
-
½ tsp paprika
-
2 tbsp chopped fresh parsley
-
12 King’s Hawaiian Origin extractal Hawaiian Sheet Rolls, kept in the full sheet form
-
2 cups shredded mozzarella cheese
-
Chopped parsley for serving
-
Chili flakes for serving
Instructions
-
Step 1
Roast garlic: Toss whole, unpeeled garlic cloves with olive oil and a pinch of salt. Wrap in foil and roast at 400°F (200°C) for 30-40 minutes until soft. Squeeze out the roasted garlic cloves and mash. -
Step 2
Prepare garlic butter: In a bowl, combine melted butter, mashed roasted garlic, egg, milk, ½ tsp salt, paprika, and 2 tbsp chopped fresh parsley. Whisk until well combined. -
Step 3
Prepare bread: Slice the King’s Hawaiian Sheet Rolls horizontally while still in the full sheet form. You can also use a baguette, sliced lengthwise. -
Step 4
Spread garlic butter: Generously spread the prepared garlic butter mixture over the cut sides of the rolls. -
Step 5
Add cheese: Sprinkle the shredded mozzarella cheese evenly over the garlic butter. -
Step 6
Bake: Place the prepared bread on a baking sheet. Bake in a preheated oven at 375°F (190°C) for 12-15 minutes, or until the cheese is melted and bubbly and the bread is golden brown. -
Step 7
Serve: Garnish with chopped parsley and chili flakes before serving warm.
Important Information
Nutrition Facts (Per Serving)
It is important to consider this information as approximate and not to use it as definitive health advice.
Allergy Information
Please check ingredients for potential allergens and consult a health professional if in doubt.